Integrate your chatbot with Zendesk
Zendesk is a customer service software and support ticketing system. It helps businesses connect with customers on various channels, manage and update user's information and requests.
This tutorial will show you how to integrate your BotStar chatbot with the Zendesk app. There are two integration hubs to connect BotStar and Zendesk:
In just a few minutes and without coding, Zapier/Integromat will support you to integrate BotStar and Zendesk easily. Below is the diagram explaining how we can do it:

The diagram shows how integration apps work when integrating BotStar and CRM systems (Customer Relationship Management). As shown in the diagram above, when a BotStar bot receives user input:
- Zapier can create automation between apps by using Triggers and Actions. The trigger is the event in an app that starts the Zap. Action is the event that completes a Zap.
- Integromat works by linking together your BotStar App and Zendesk by their corresponding modules to create a scenario that will transfer and transform your data automatically for you. Every time a trigger runs or an action performs a task, it is considered one operation.
BotStar application currently supports these following Triggers: New Checkpoint Record, New Subscriber, Updated User Attribute, New Request for Human Takeover, New Tag on User.
For more information, please see Zapier and Integromat before continuing this tutorial. In just a few minutes and without coding, Zapier and Integromat support you to integrate BotStar and Zendesk easily.
Note: This tutorial assumes that you already have BotStar account, Zapier account, Integromat and Zendesk account.
Set up actions in BotStar
Set up User Attributes
Drag and drop the Update User Attributes action into the Flow Editor and customize this action. When the conversation with customers go through the Update User Attributes action, users' information is automatically updated.

To check information which is saved by Update User Attributes action, click Reports & Insights > Audience.

If you don’t know much about this feature, please learn more about User Attribute.
Set up Checkpoint
In this tutorial, we will guide you step-by-step on how to transfer data from your BotStar chatbot to Zendesk (through Integromat).
The idea is to collect data about a deal submitted by your users to Checkpoint records, before transferring automatically to Zendesk. If you don’t know much about this feature, learn more about Checkpoint before continuing on this tutorial.
Connect to Zapier
This tutorial will guide you to use prebuilt Zap Template: Update Zendesk users from updated BotStar user attributes. Zap Templates are the fastest way for you to automate workflows.
Expected result
After the successful integration, data in the Zendesk app is updated whenever a user enters information about their contact. This is a conversation between the bot and user:

To view information displayed in Zendesk, click Admin > People:

Setting up the integration
Step 1: Go to Bot Builder > Integrations in your Bot and enable Zapier. Then choose the Zap Template Update Zendesk users from updated BotStar user attributes click Use this Zap.

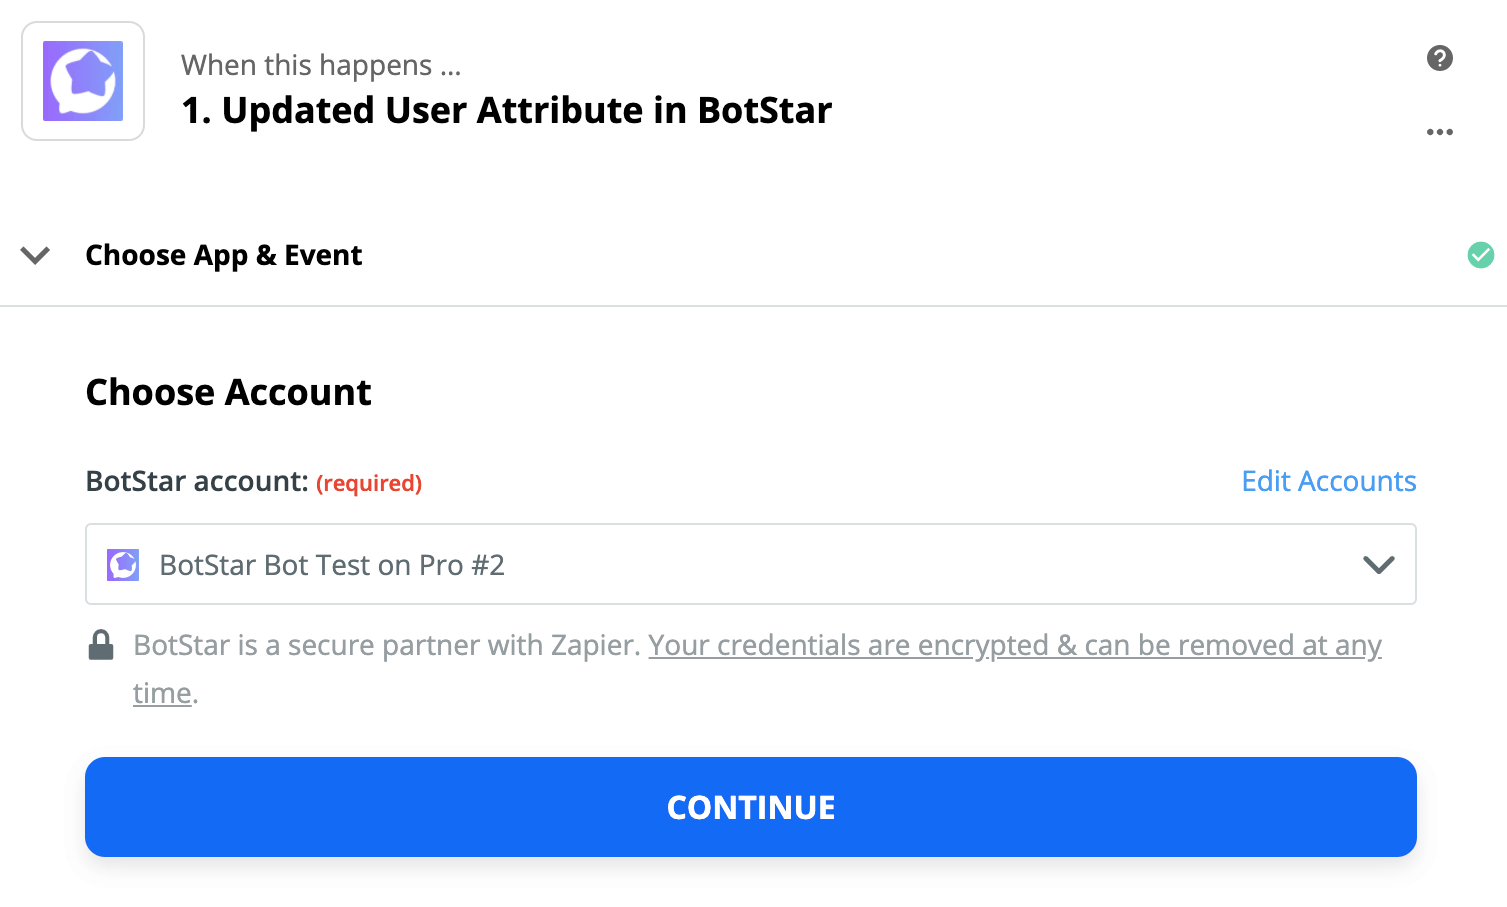
Step 2: Click Add a new account to create a new one (If you don't have any an existing account). All your bots will show up here, choose one of your chatbots and click Connect. You can also select from an existing account.

After connecting with the bot, click Continue.
Step 3: Set up customize Attribute Modification. All the user attributes will be shown here, pick the attribute you want to add to your Zendesk (in this example, we will choose the email attribute).

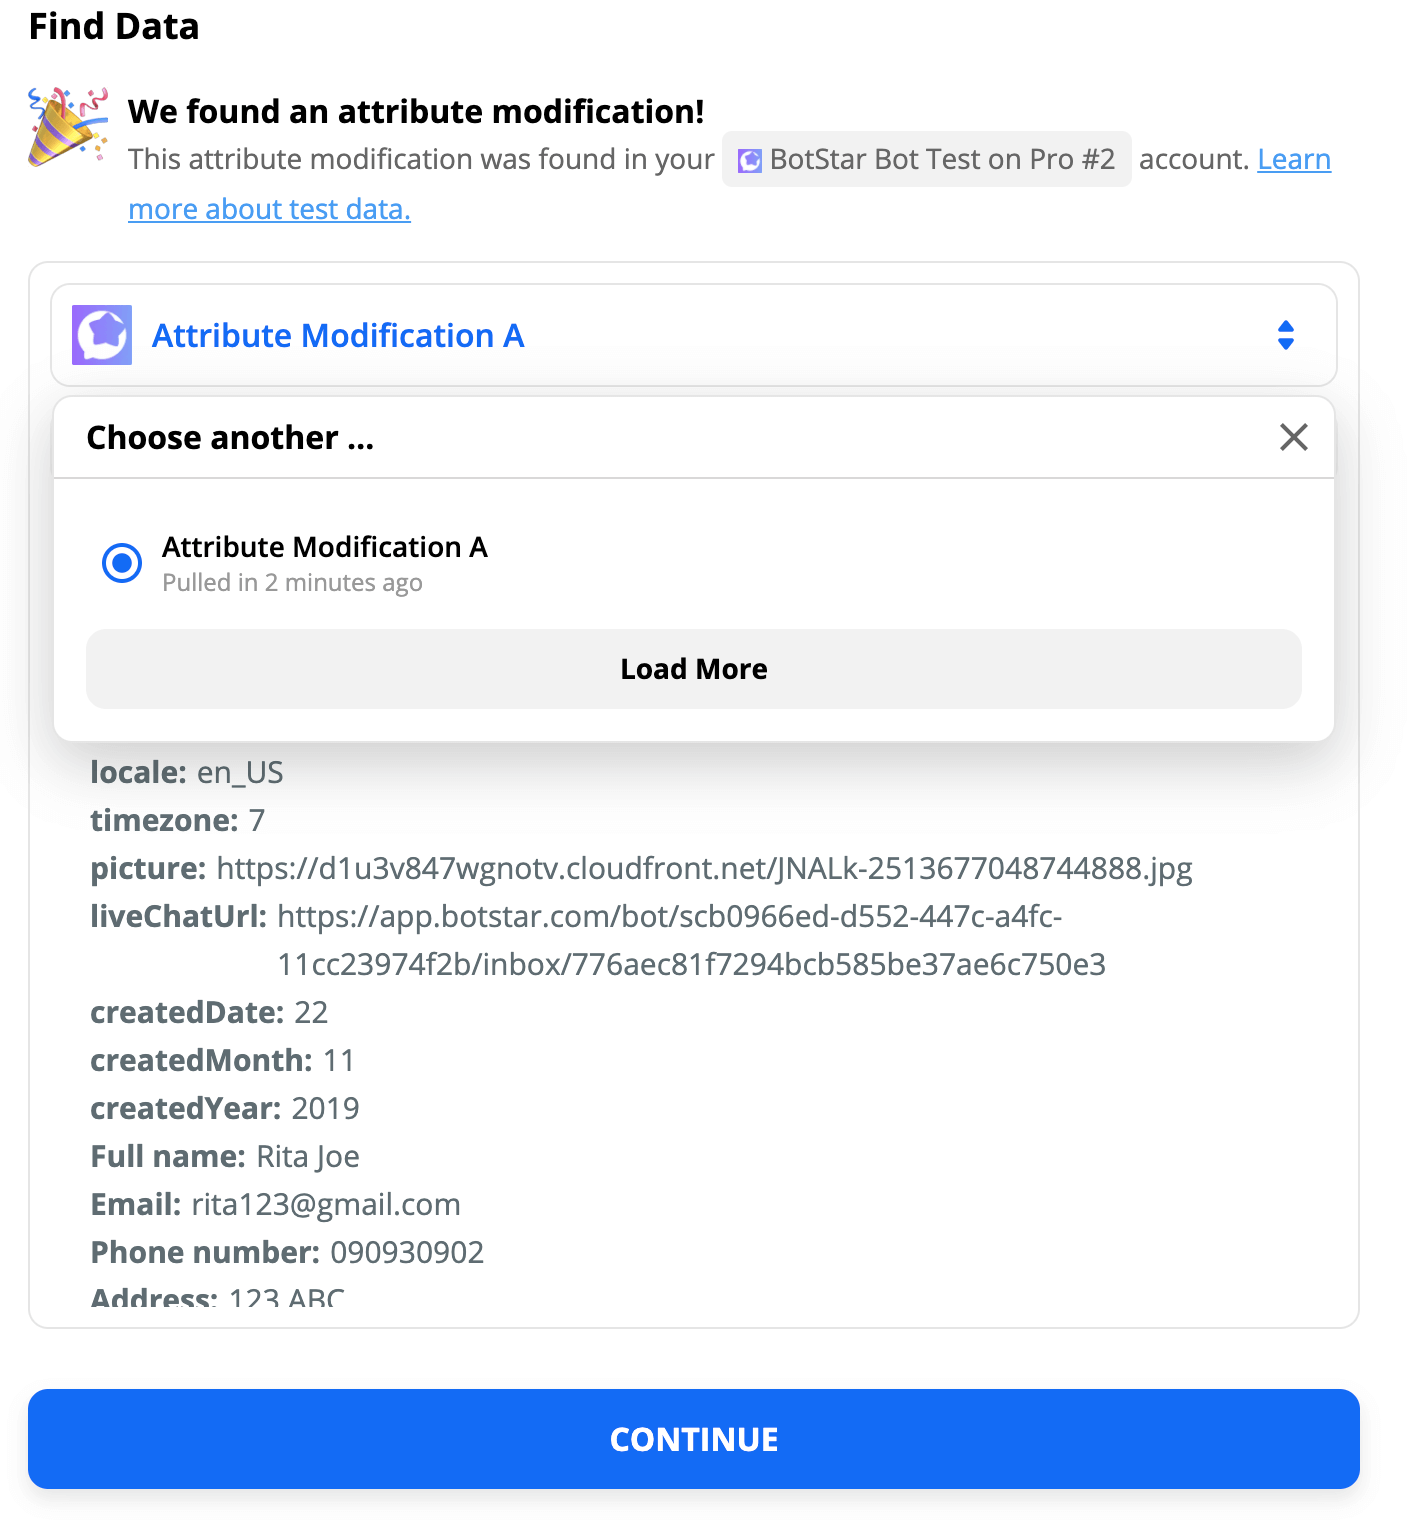
Step 4: Click Test Trigger.
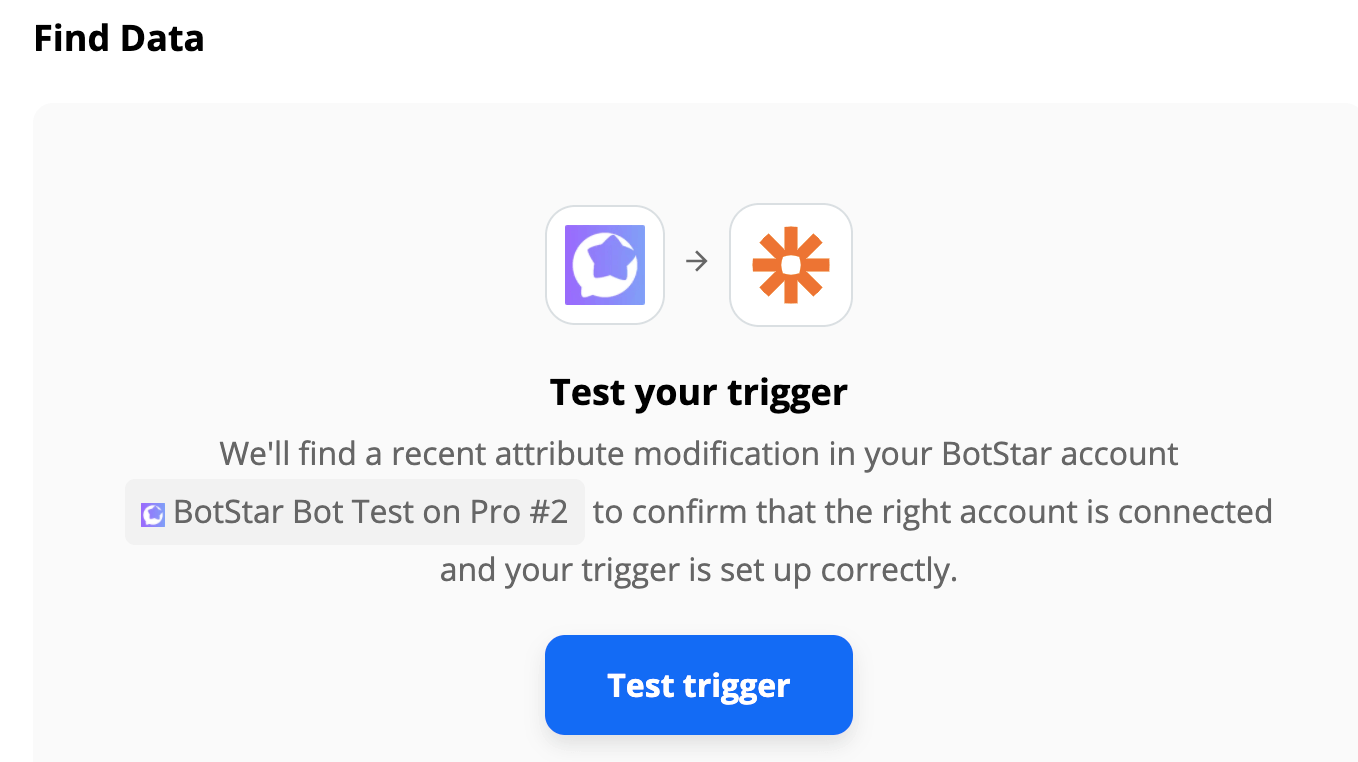
Choose a sample to finish Trigger settings.
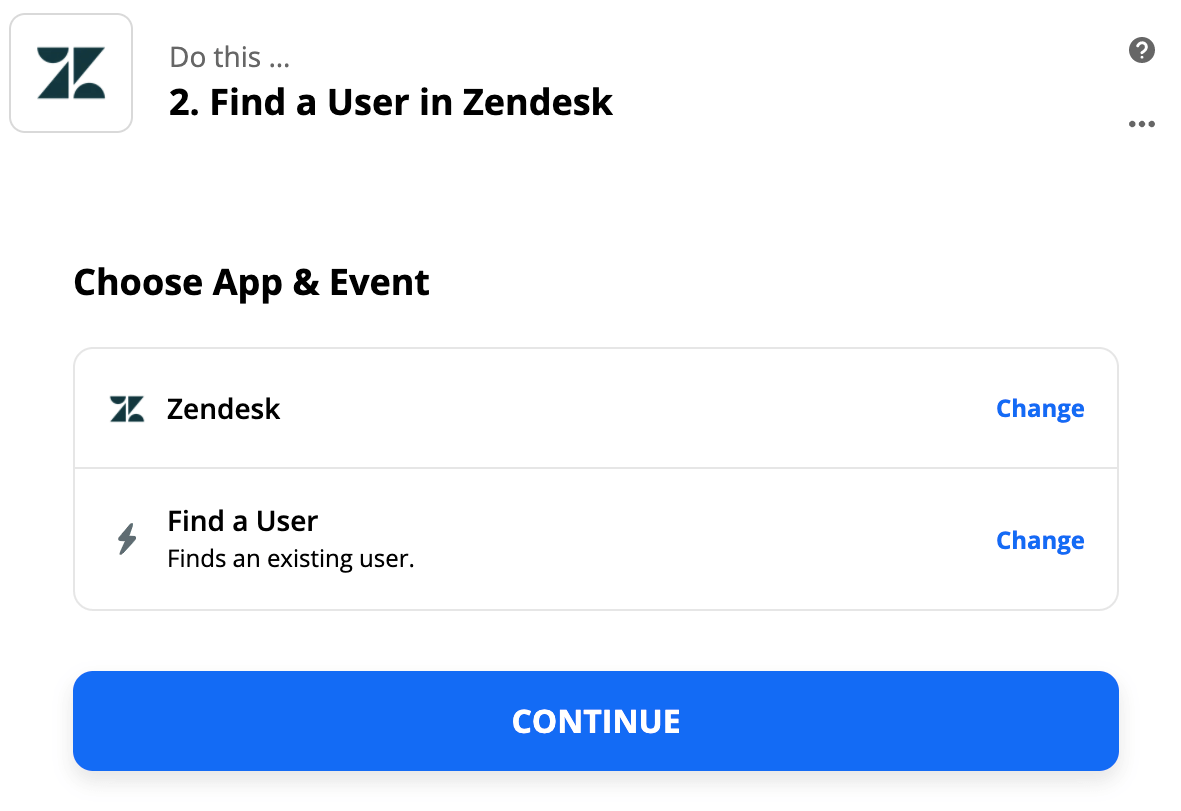
Step 5: Before creating a new contact, you need to find a user to know an existing user or not and create one if none are found.
Step 6: Sign-in to your Zendesk account to Verify the account. You will need to allow Zapier to access your Zendesk account to continue.
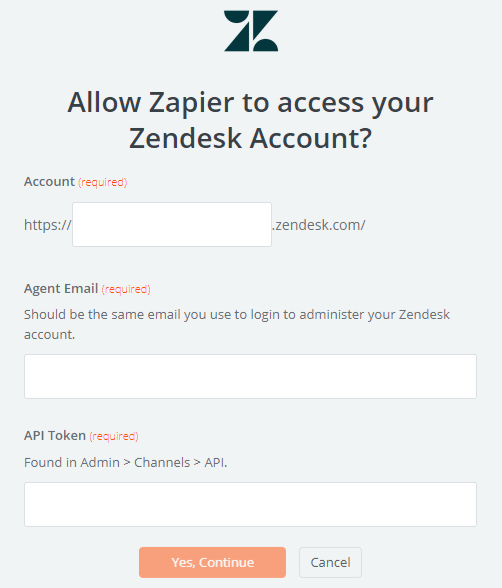
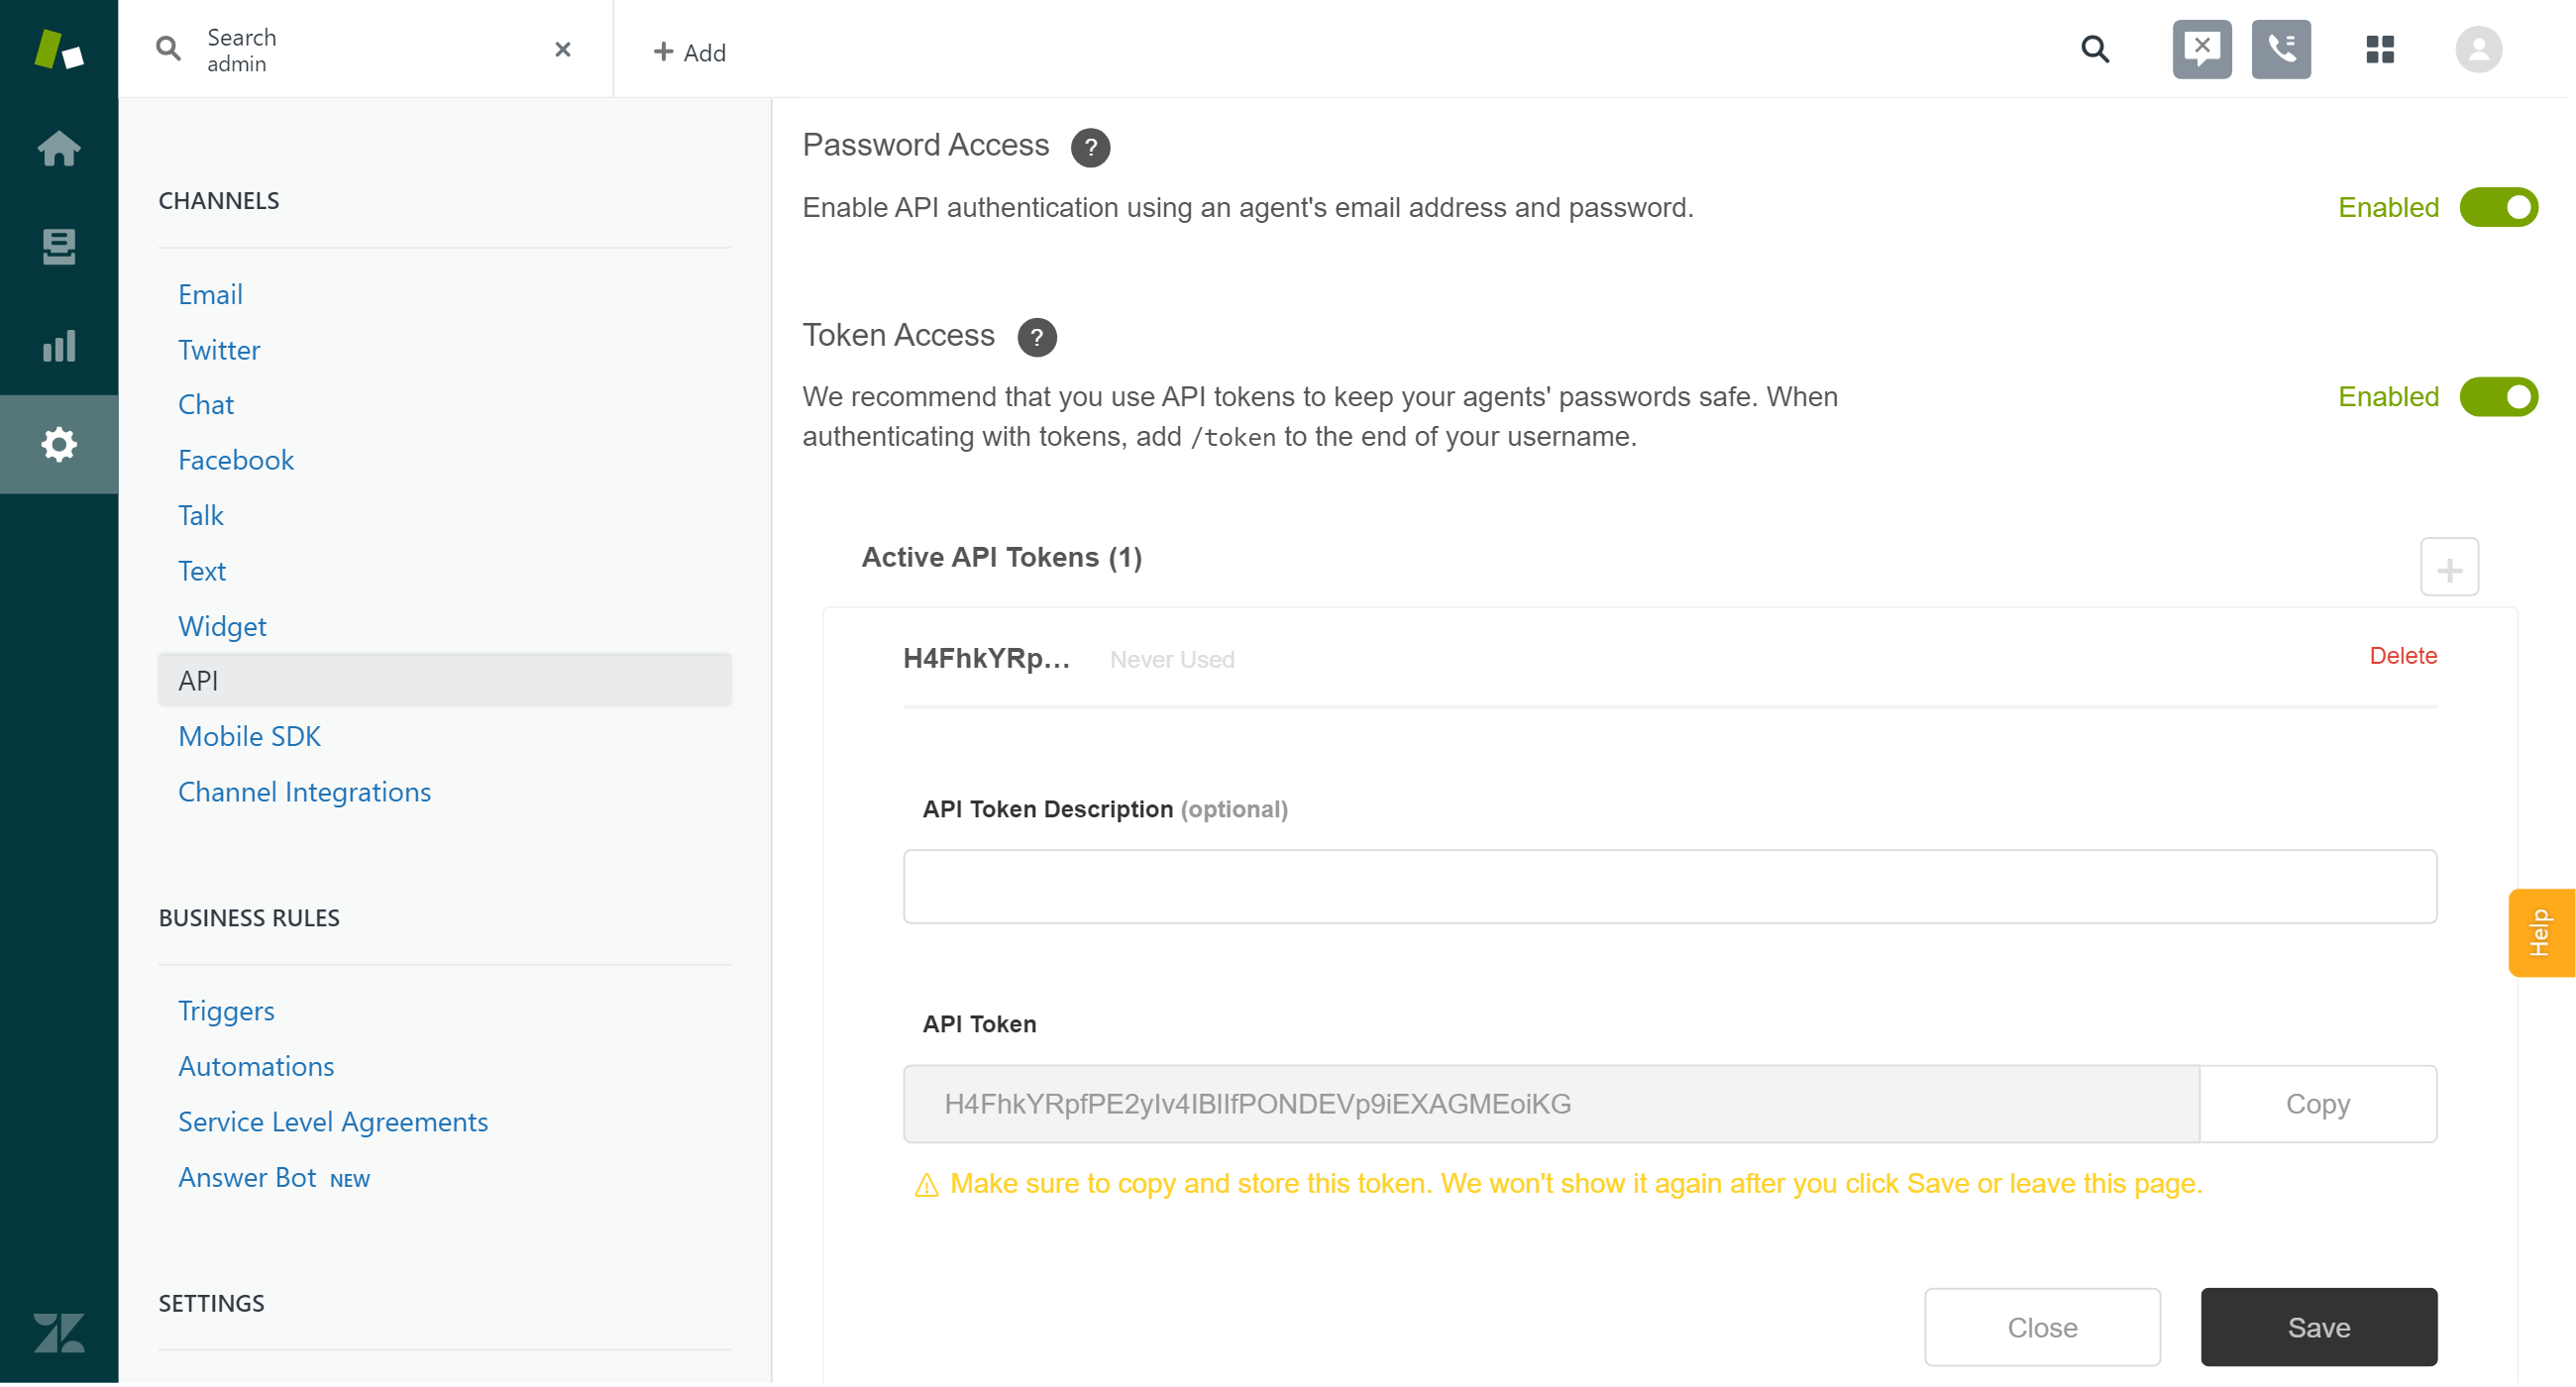
Find the API Token.
After you fill in this form to allow Zapier access your Zendesk account:

Finally, choose a Zendesk account, click Continue.

Step 7: Setup Template for Zendesk. Select a field to determine how we'll look up the user in Zendesk.

Step 8: Zapier will suggest you send a sample to Zendesk for testing. Or you can skip the test if you want.

Step 9: Select Zendesk account and click Continue.

Step 10: Select the sample information from BotStar User Attribute corresponding to the fields in Zendesk to set up the template. In the below example, we fill in two required fields which are "Name" and "Email".

Step 11: After setting up the template for Zendesk, the application requests your final test.
Step 12: Finally, turn on your Zap and give your Zap a name. Your Zap will run automatically from now on until you turn it OFF.
Congratulations! Finally, you completed the integration between your chatbot and the Zendesk application. Now, you can test the integration by chatting with the bot and see the result of successful integration. Also, you can edit the steps or change specific details at any time by finding all of your Zaps on your My Apps page.
Connect to Integromat
Expected result
After the successful integration, data in Zendesk app is updated whenever a user enter information about their deal or their contact. This is a conversation between the bot and user:

To view information displayed in Zendesk, click Views > All unsolved tickets:

Setting up the integration
Step 1: Log in into Integromat, click on Create a new scenario.

Enter "webhooks" in the search box then choose the Webhooks icon. Click Continue on the upper right corner.

Step 2: Add the Webhooks trigger Custom Webhook to your scenario to connect BotStar with Integromat.

Step 3: Click on the Add button next to the Webhook field and enter a name for the new webhook.
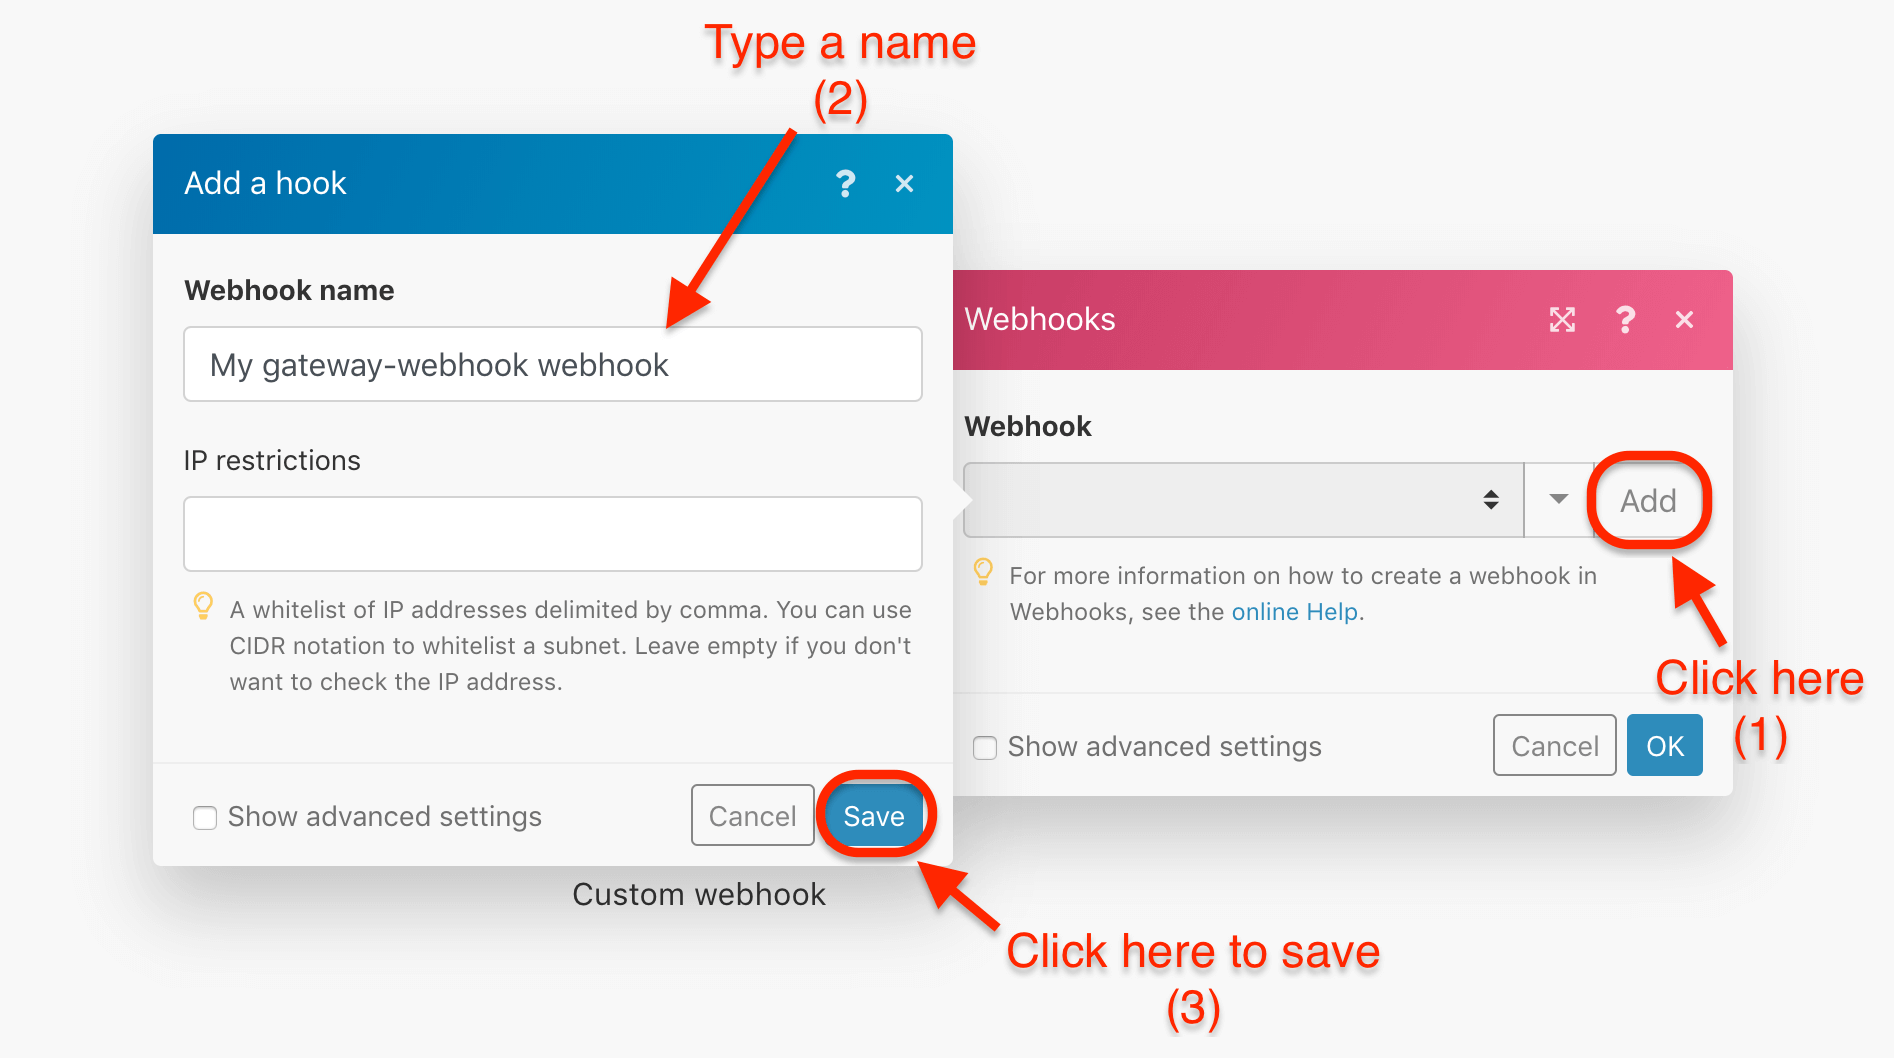
TIP: Once you create a webhook, you can use it in more than one scenario at the same time. Each scenario may contain different modules and have a different schedule. The data is duplicated, that's why the individual scenarios do not influence each other.
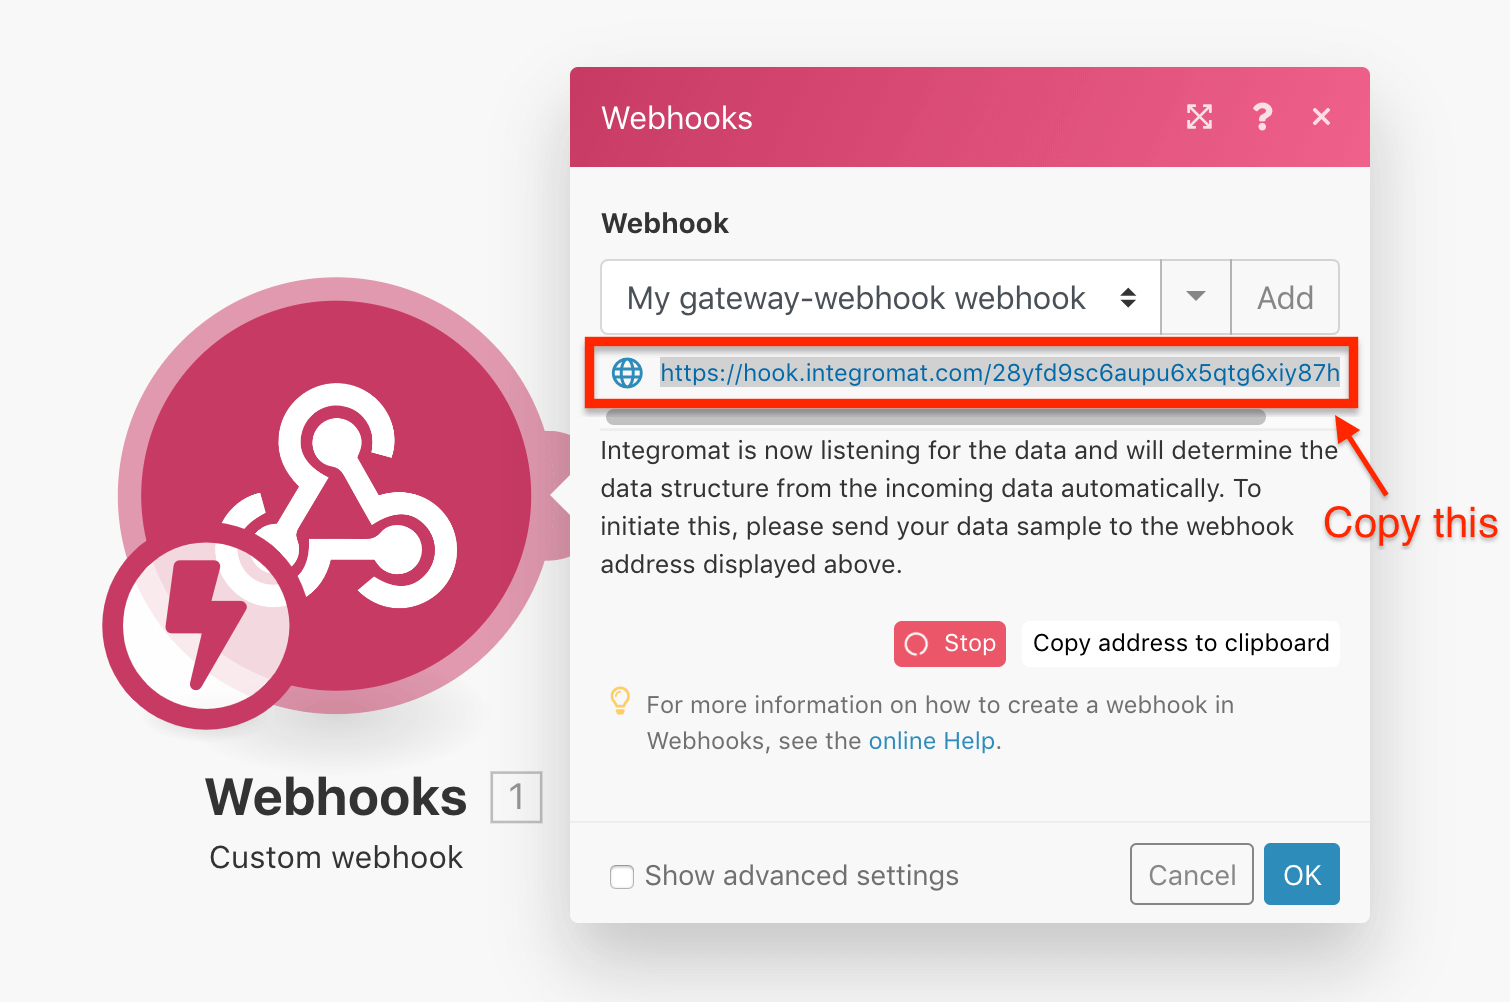
Once you create a webhook, you will see a unique URL that Integromat will trigger to. The data sent to this address is first validated and then passed on for processing in the scenario.
To enable the option to map items outputted from the webhook, Integromat needs to determine the data structure of the incoming payload so the other modules know what to expect from the webhook. That's why Integromat will ask you to send sample data to the displayed address:
Step 4: In BotStar App, go to Bot Builder > Integrations and enable Integromat. After that, select an event type you want to receive data back and paste the link from Webhook into Endpoint, then save it.

Press "Preview" to test your bot so Integromat can understand the data structure from BotStar.

If everything went right, the data structure of the webhook should be determined and you should see a message "Successfully determined":

Step 5: In Integromat, find and select Zendesk as the next app to save data from BotStar. Click Add another module and find Zendesk. After that, select Create a ticket action to create deal.

Step 6: In Zendesk, navigate to CHANNELS > API, click on OAuth Clients and select Add a client. This will open a form for creating a new client.
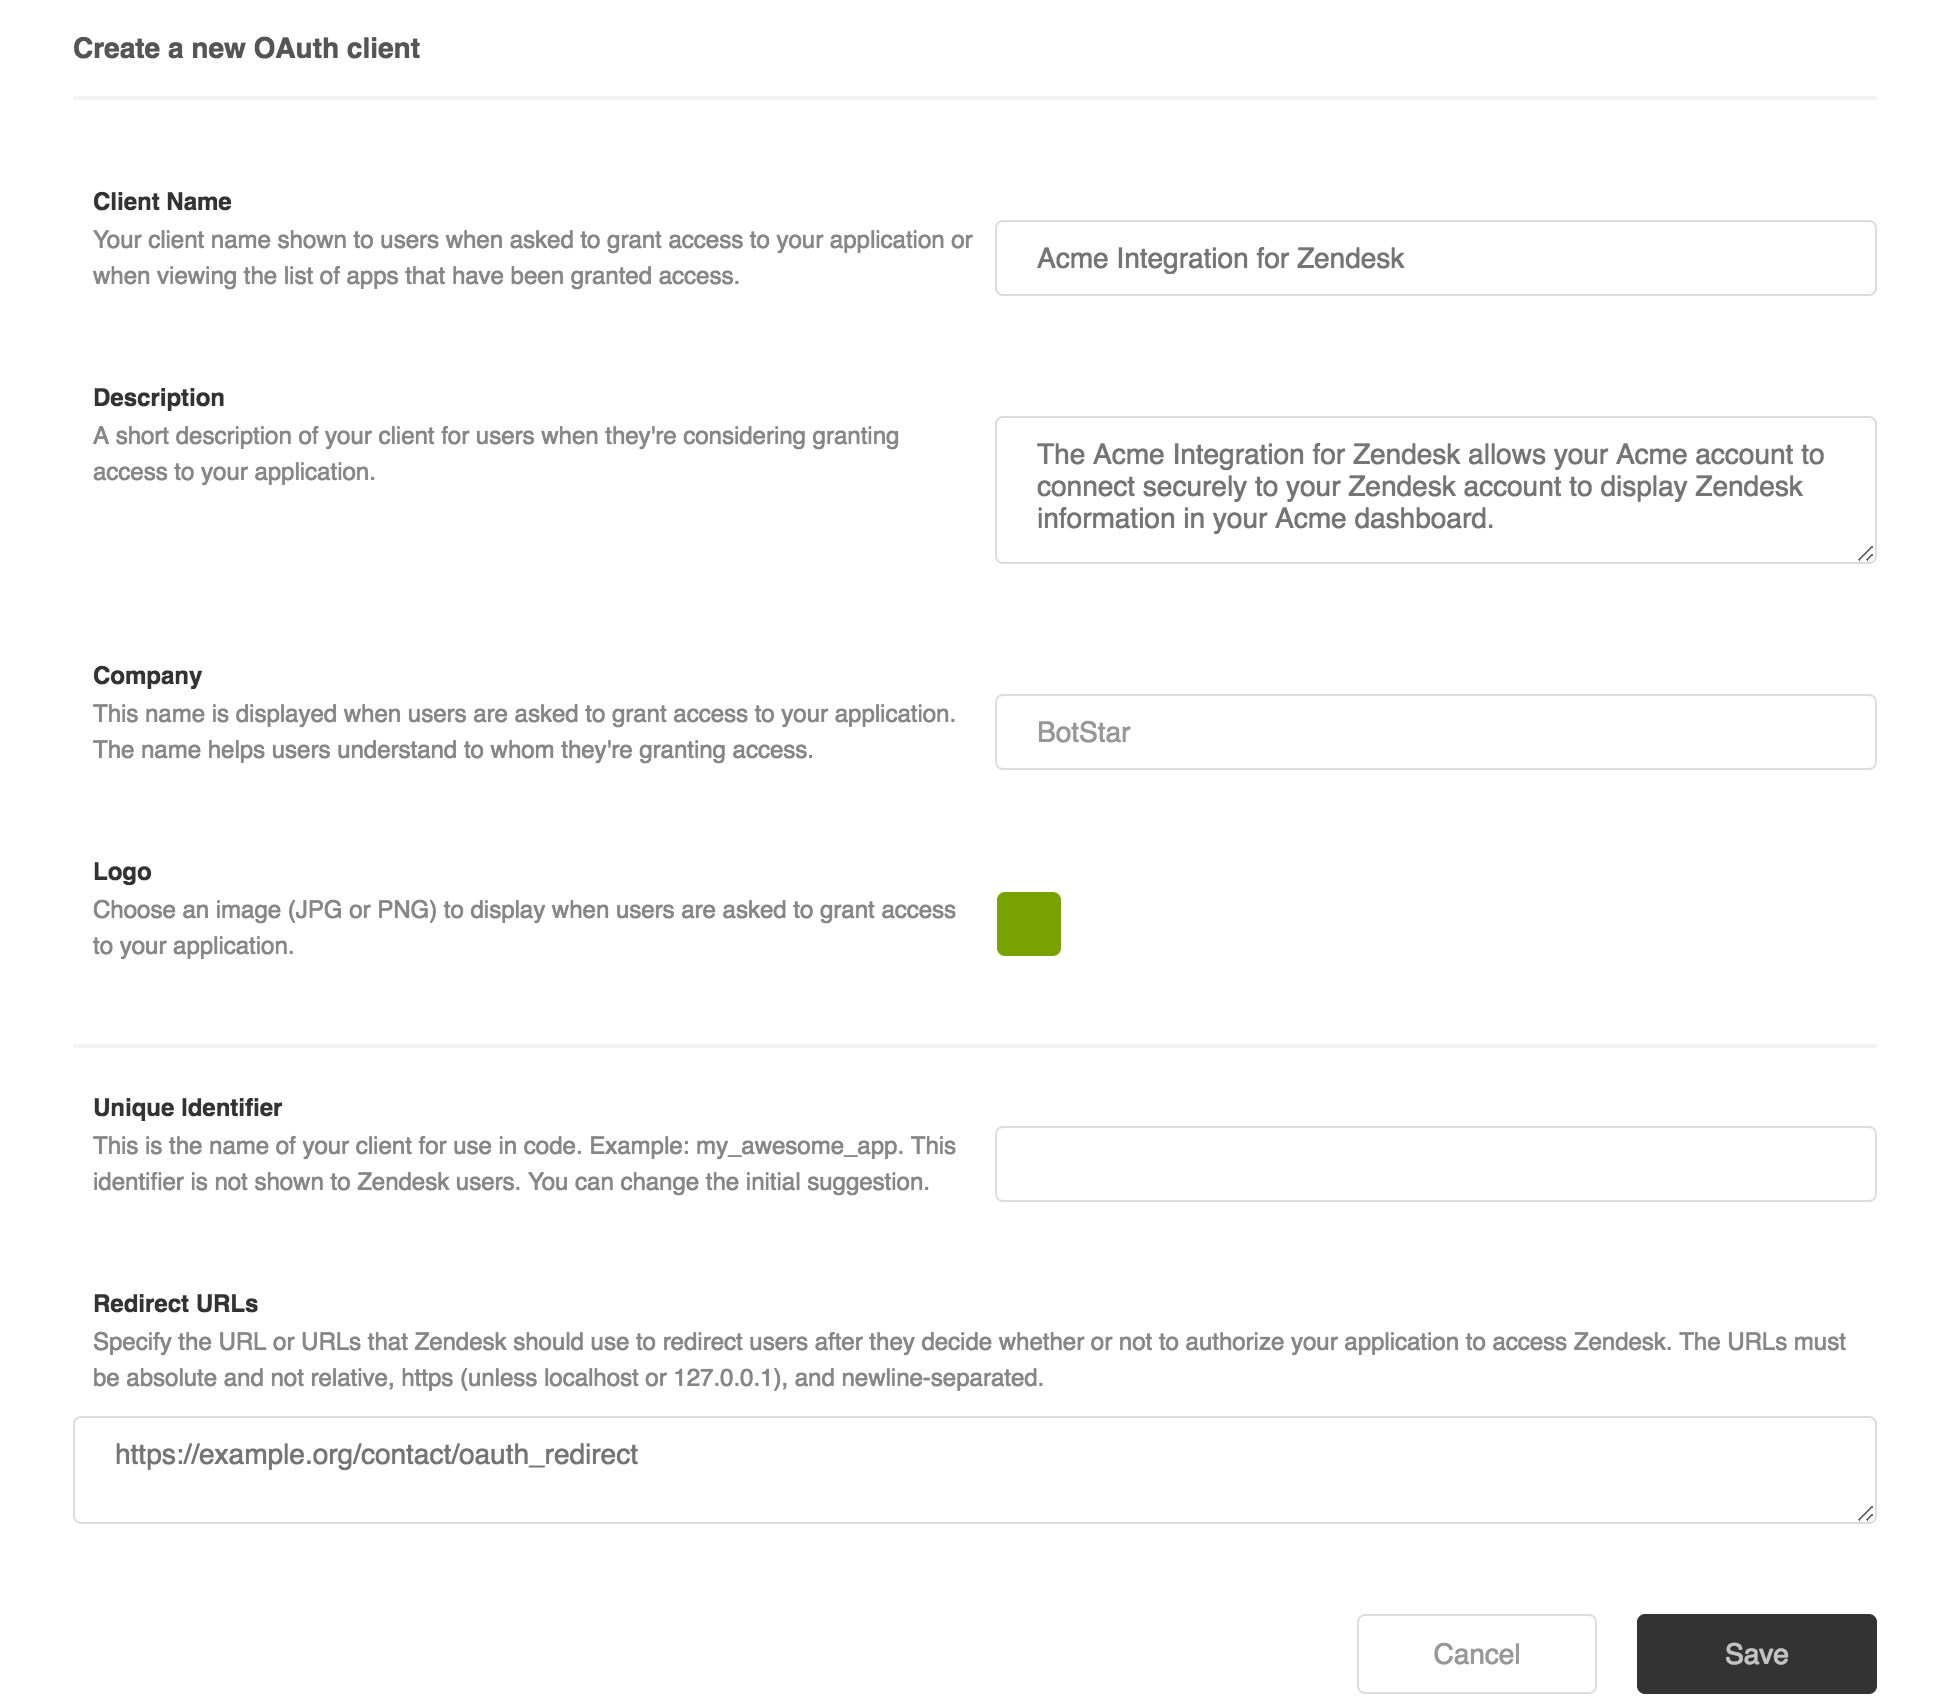
Complete the following fields:
- Client Name: Enter a client name for your identification.
- Unique Identifier: This field is auto-populated. You can change it if you want. Make sure you write down this identifier. Integromat will ask you to enter it when creating the connection.
- Redirect URLs: Enter https://www.integromat.com/oauth/cb/zendesk/.
After clicking Save, a message pops up and prompt you to save the Secret:
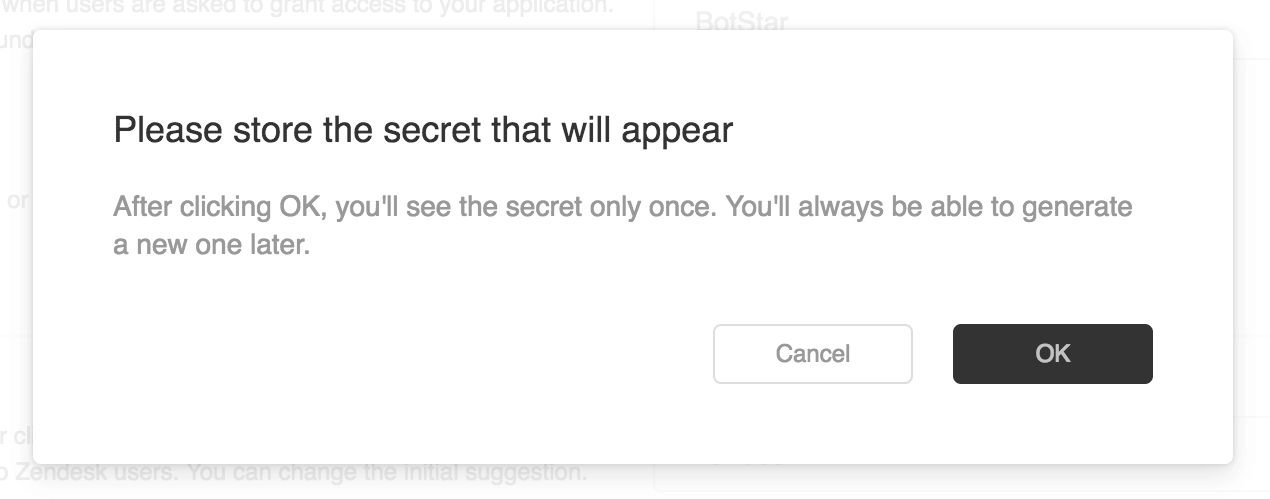
Write down the Secret and Unique Identifier value. You will need it for creating the connection. Clicking the Save button will create the client. Now, you can create the connection with Integromat.
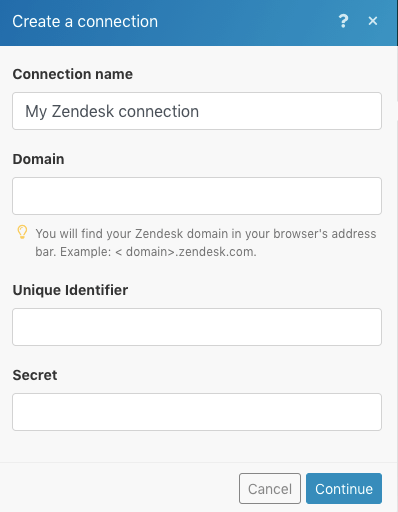
Step 7: Go back to integromat, click Zendesk icon > click Add > enter the Domain/Secret/Unique Identifier values that you have written down earlier.
Click Continue then Integromat will then redirect you to the Zendesk website where you will be prompted to grant Integromat access to your account:
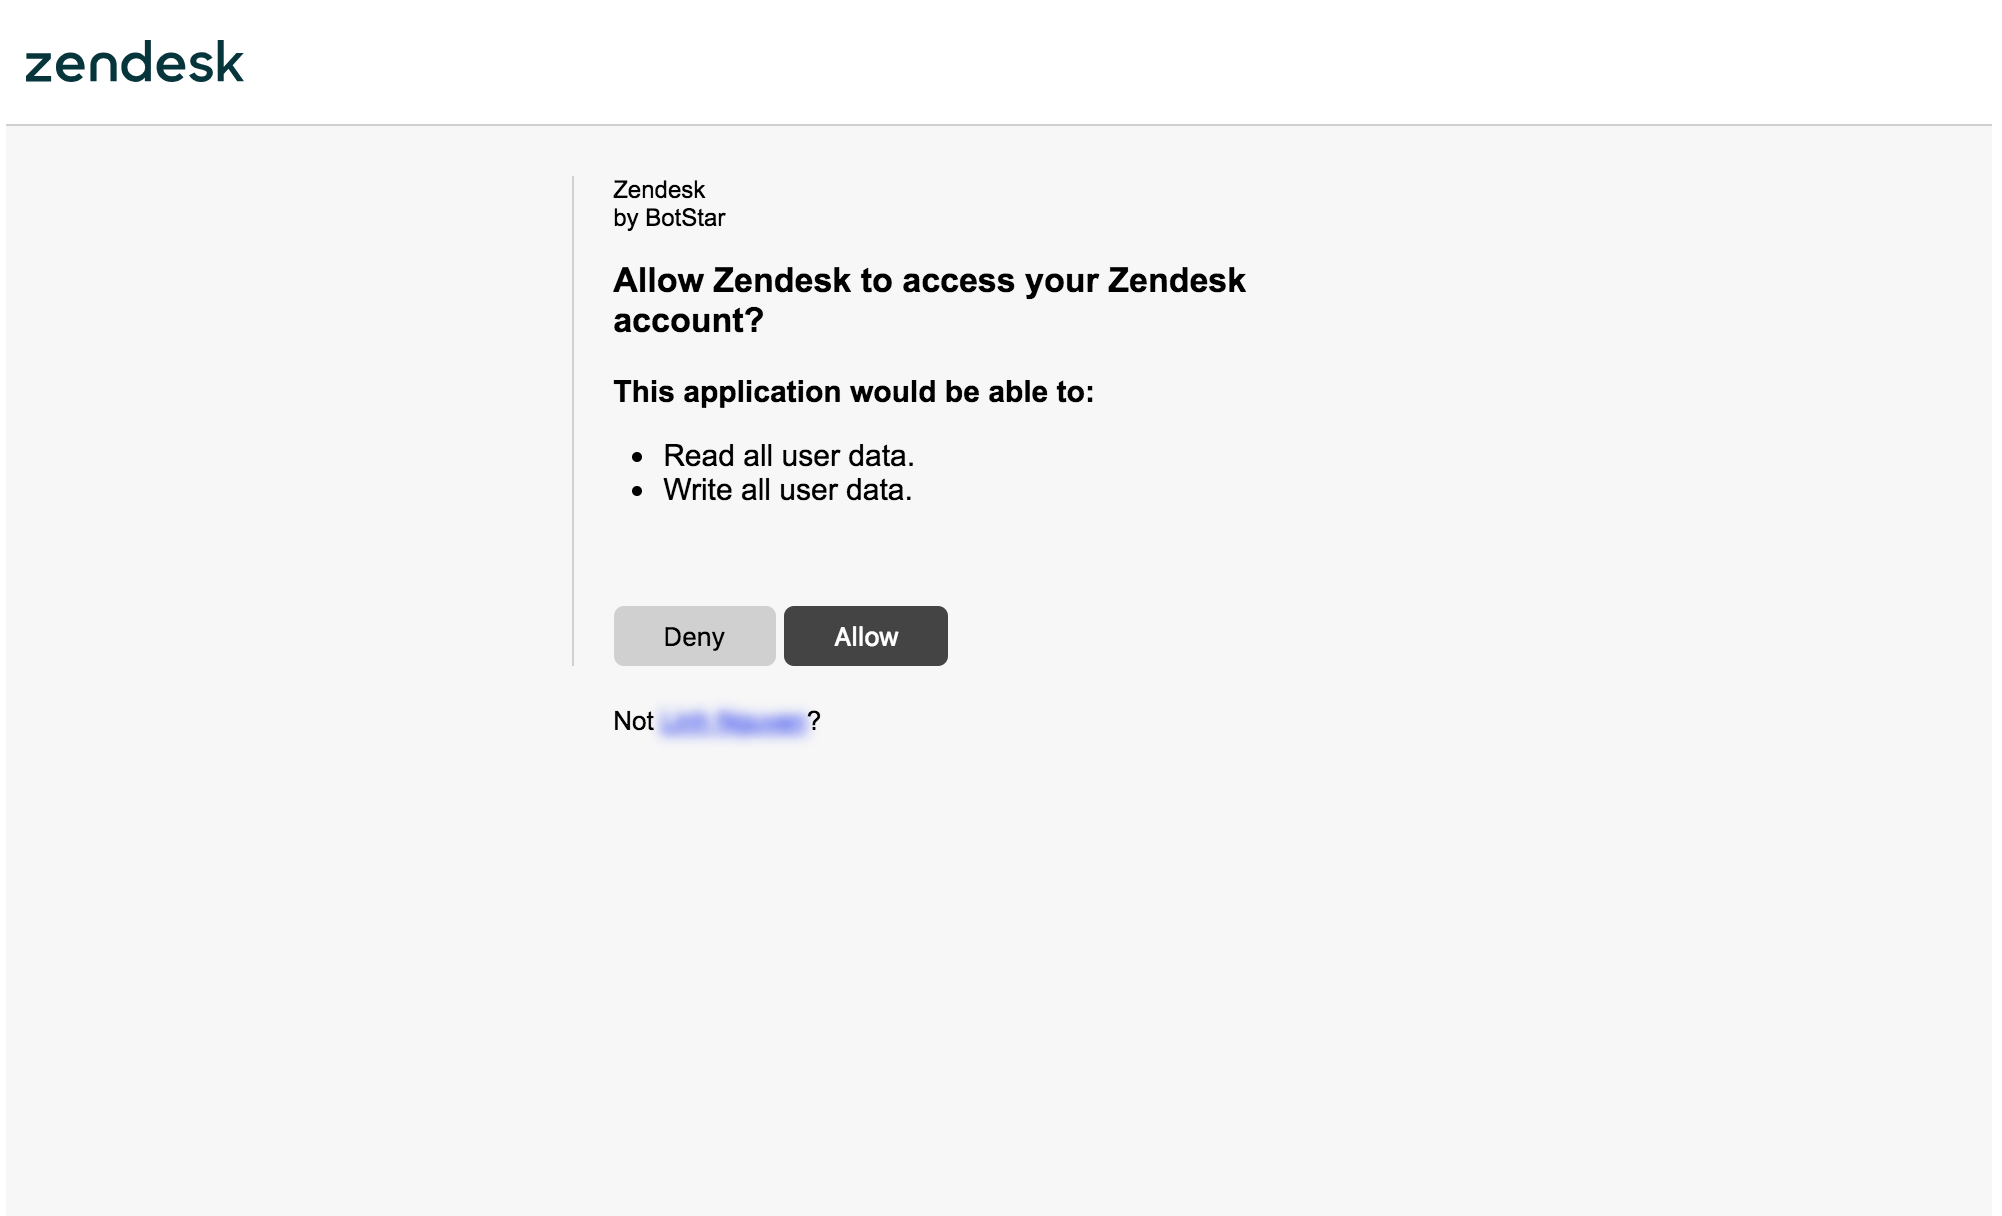
Here, allow access by clicking the Allow button. Afterwards, you will be redirected back to the Integromat administration page. Now, you can continue creating your scenario by creating a sample ticket.
Step 8: Select the values from BotStar Checkpoint corresponding to the fields in Zendesk ticket form.

Note: Please remember to run the Webhooks again whenever you make any changes inside the chatbot.
Step 9: Right-click on the Zendesk module and select Add error handler to handle the error data and help the flow avoid interruption while running.

Then select Directives as Ignore so that Integromat will ignore the error data while receiving.

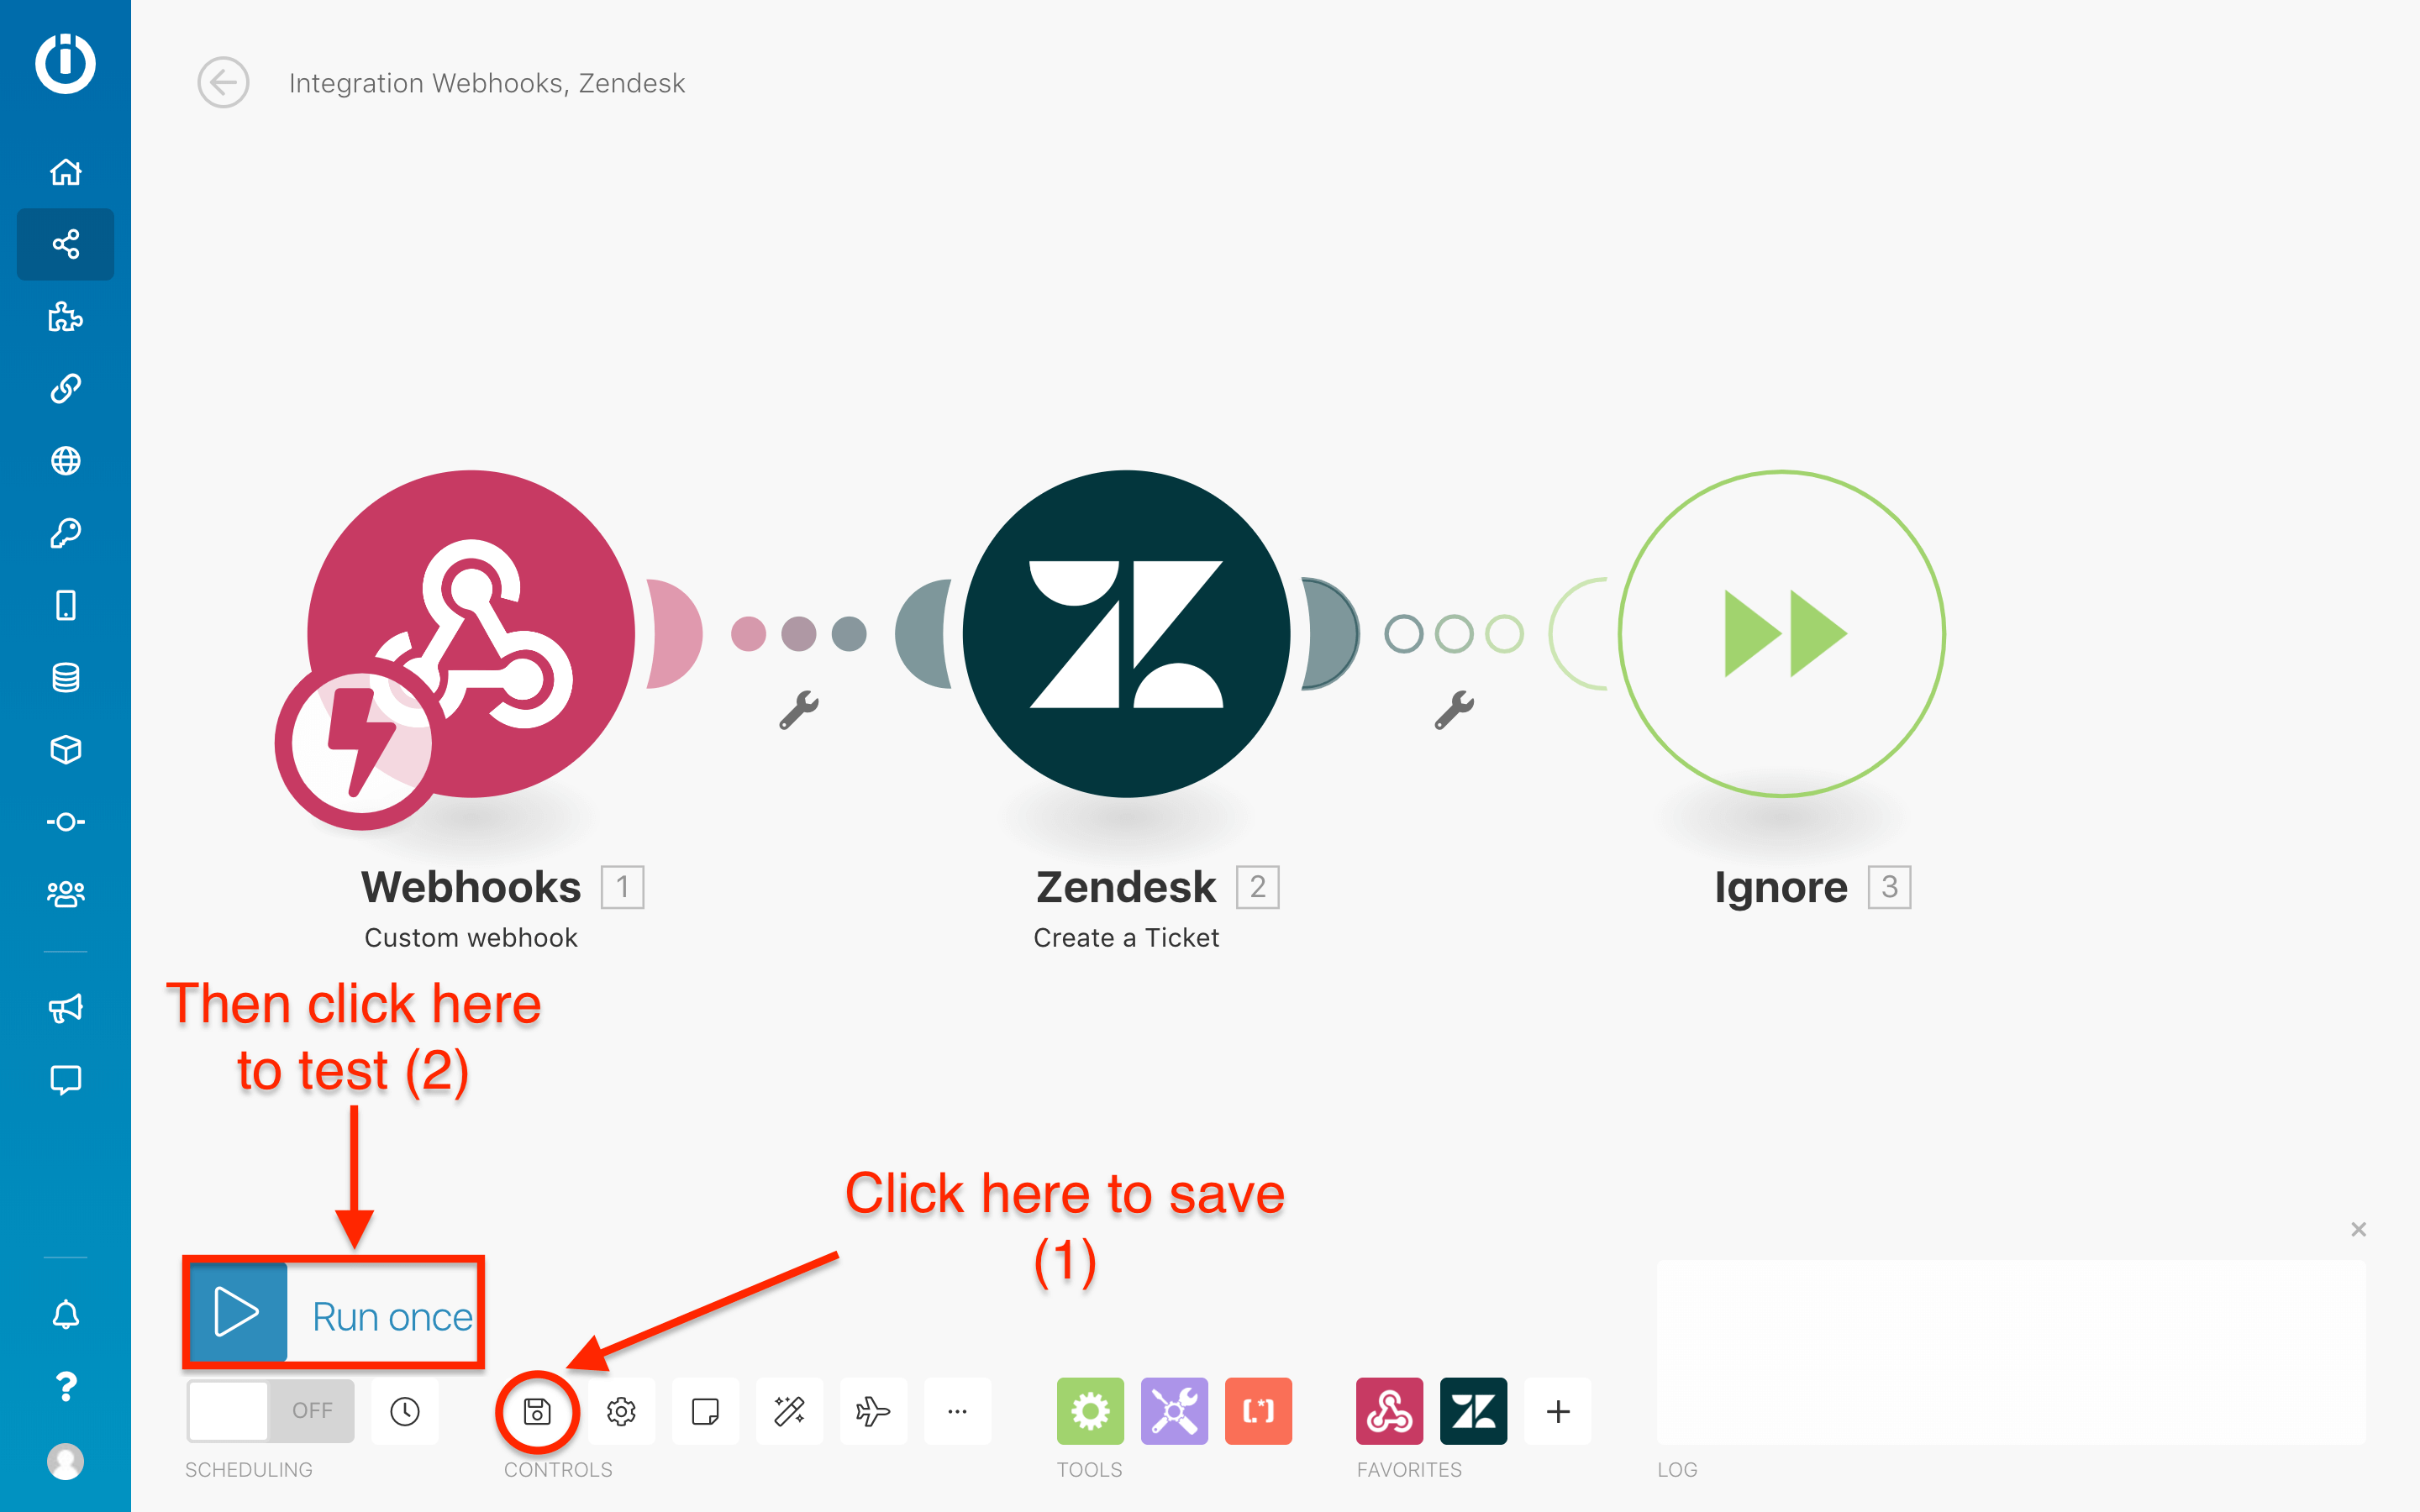
Step 10: Activate the Scenario by following these instruction:
- Click Save button.
- Click on Run once button in the lower left corner to test data before activating this scenario.
After that, send test data to this scenario by using Preview in BotStar.
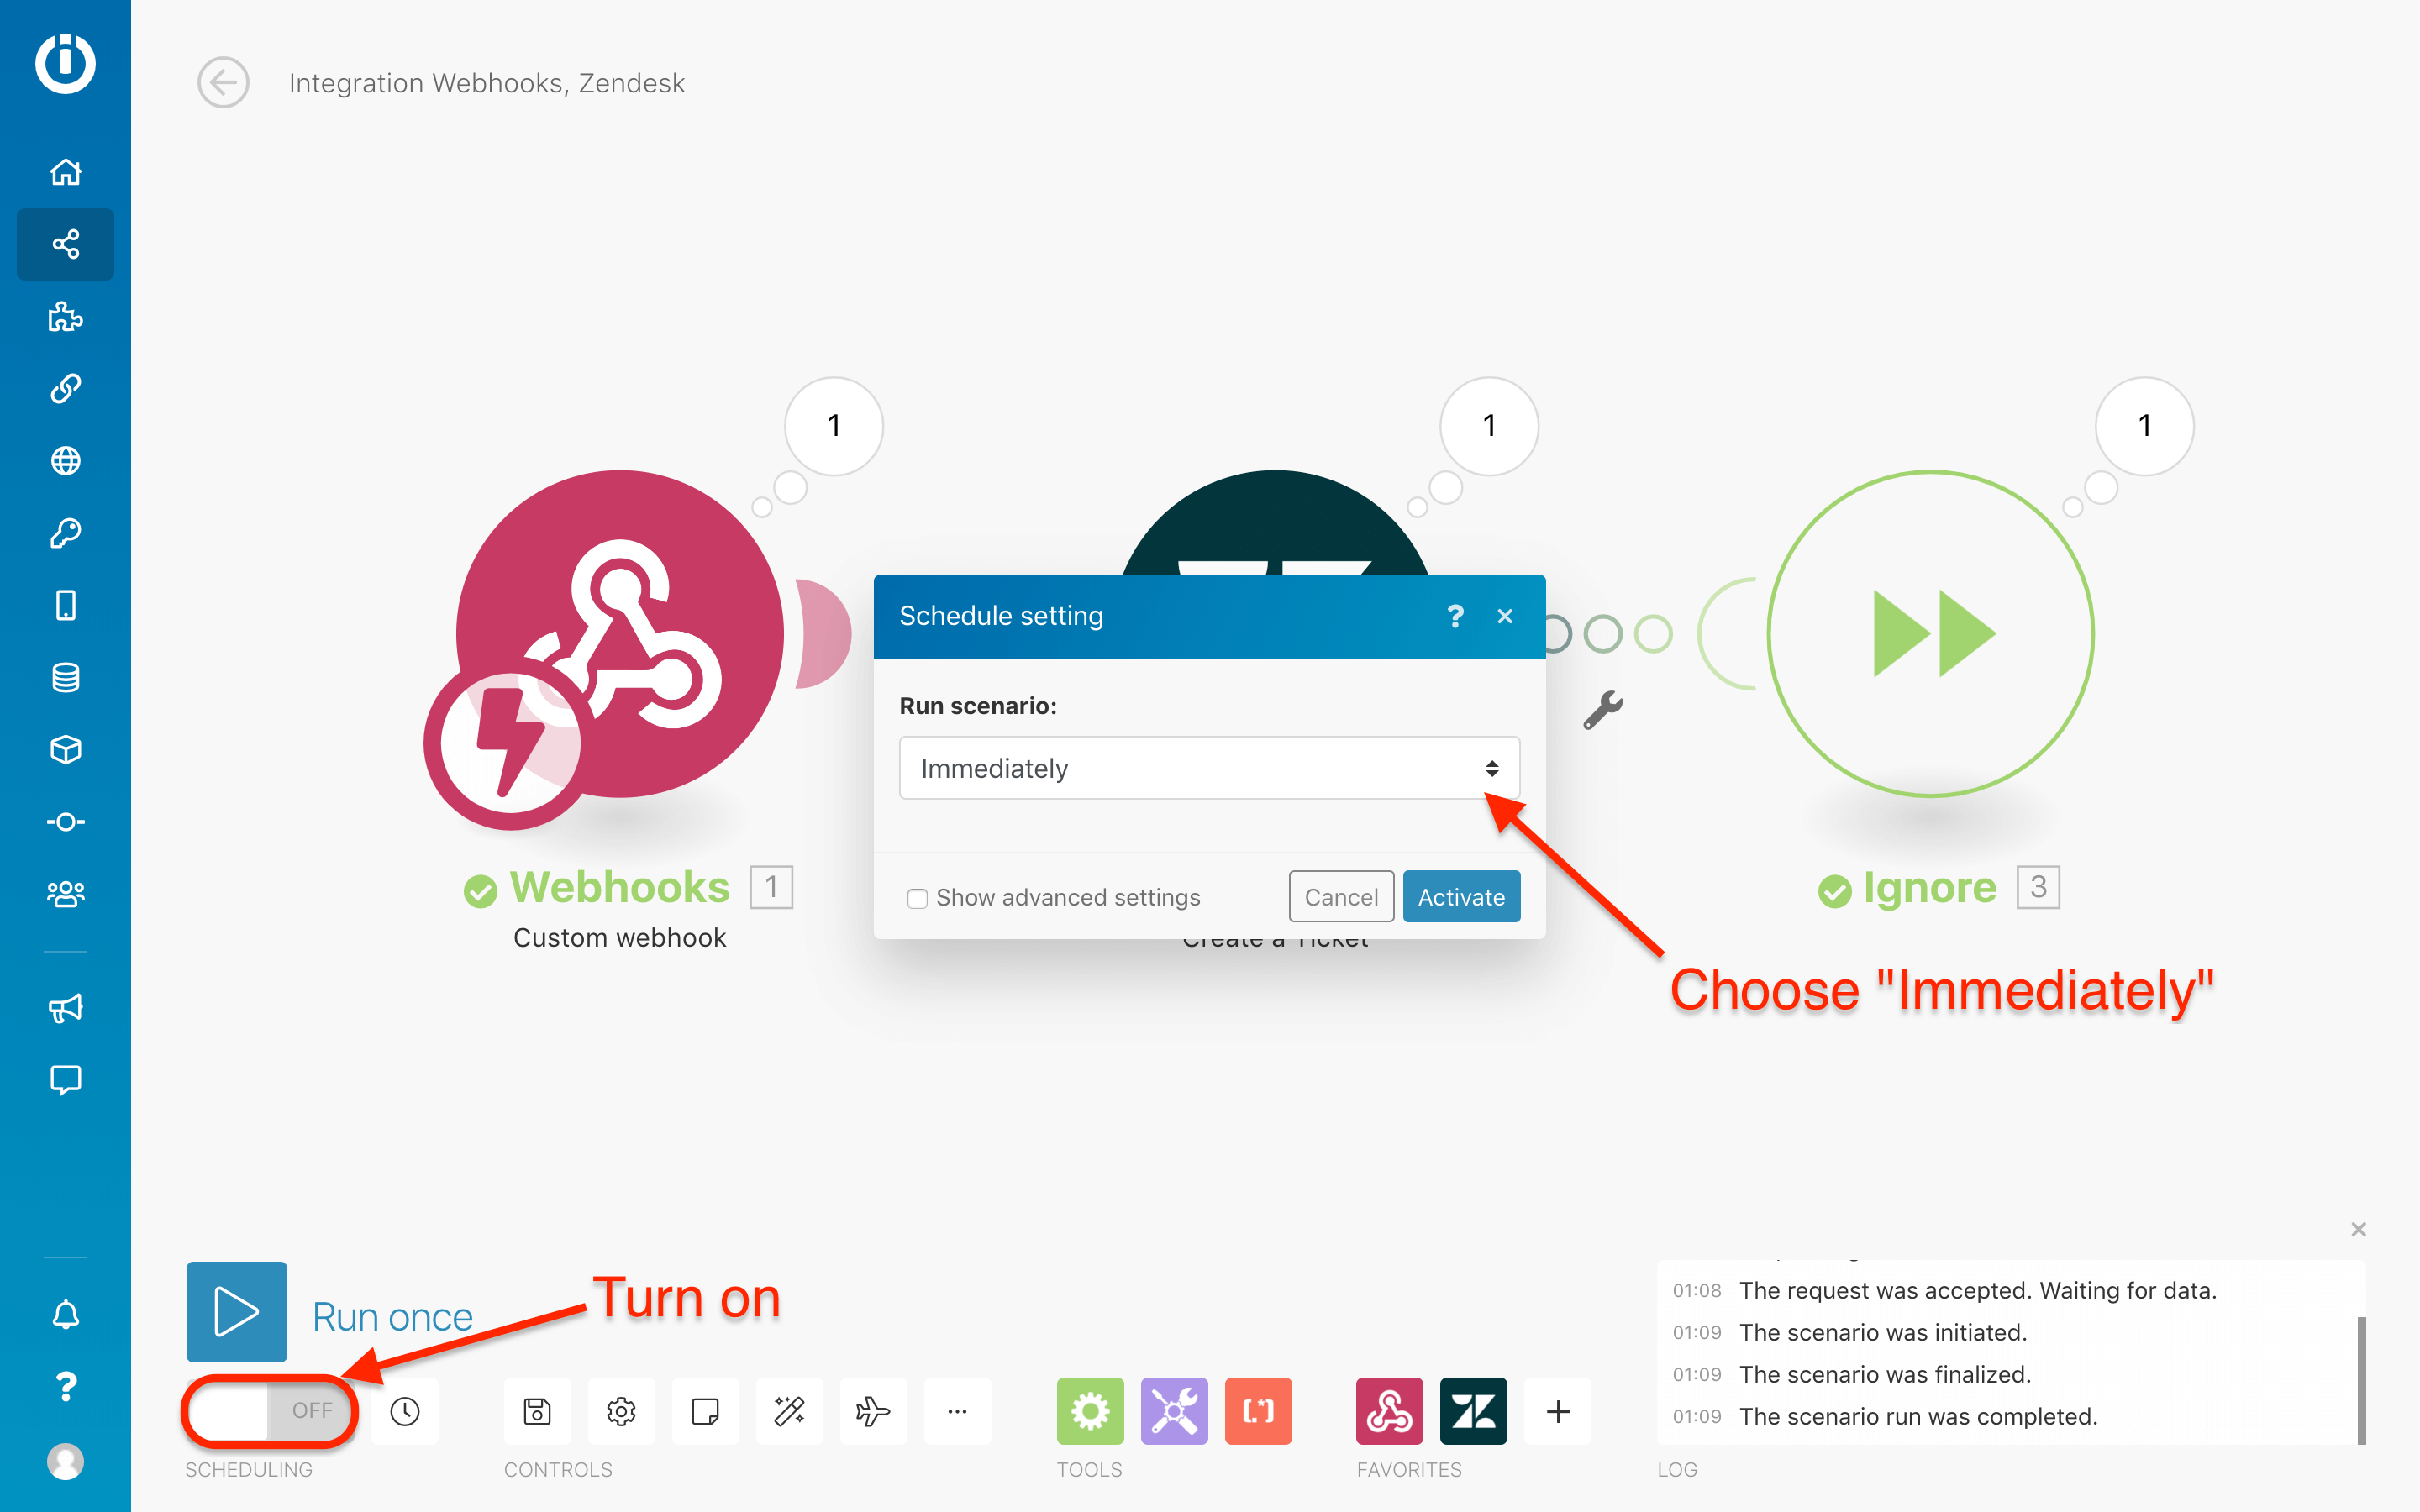
Enable Scheduling and select Immediately to trigger the scenario and extract data from BotStar to Zendesk immediately.
Done! Now you can chat with bot to test the integration and see the result of successful integration.
If you have any concerns, please feel free to leave a comment below or contact us through support@botstar.com. For more details on how we have helped our customers grow their business, you can view our use cases, blogs or join our BotStar community to learn and share new things 😊