FAQ for Building and Training
Brief Introduction
If you are wondering about how to apply some functions of basic blocks, such as button list, horizontal list or the CMS into your bot flow, this article may bring some answers to you.
FAQ for Building and Training
1. I want to add an URL in the bot, when my customers click on it, it will lead them to another site, how could I do that?
You could do it with a button list or a horizontal list block: click on the button > in Behaviour, choose Open Webview > in the Web URL box, add the URL > Publish – Update. Now, when a chat user clicks on the button, he/ she will be led to another site.

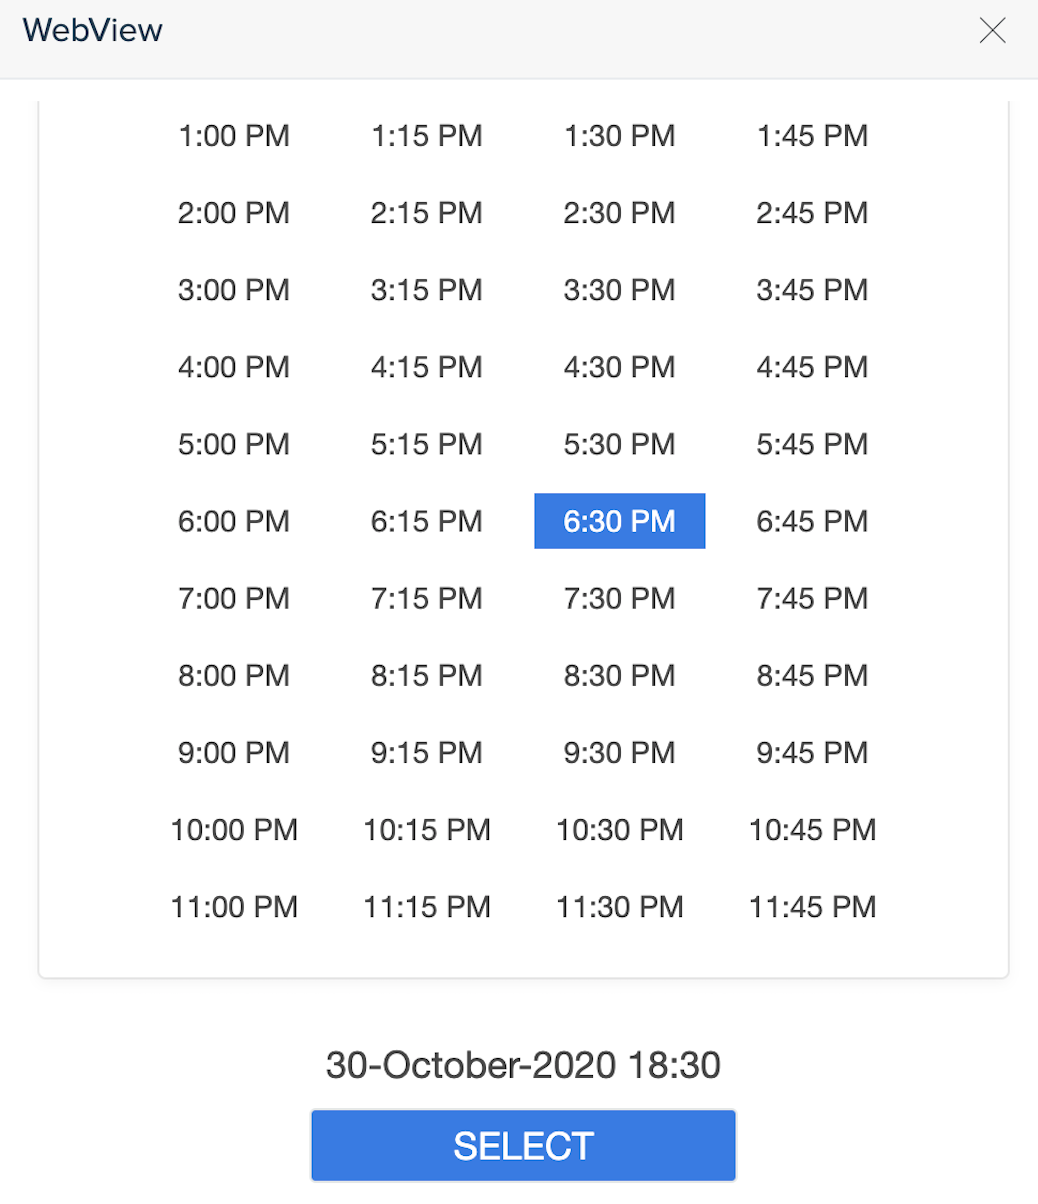
2. How come my calendar doesn’t work?
To use these features, there are two steps:
Step 1 Click on a button > in Behaviour, choose Open Webview > in Type, choose Date and Time > in Date Format, choose one > Publish – Update.

Step 2 Go to Publishing Configuration > Messenger/ Website > scroll down to Whitelisted Domains, add http://webview.botstar.com > Save > Publish – Update. In case your account is a Branded-app one, you have to add http://webview.chatbot4messenger.com/ instead.

Once you are done, the date and time webview will appear on the screen.
3. Why my Horizontal List block doesn’t work?
There are several mistakes that cause the issue. If there is a blank button without data, the flow would stop. There is a maximum of 10 items in a Horizontal List block so it is important to make sure each item should have the same value as others. For example, if the button of all 9 items has a direct link, but you forgot to fill in the URL in the button of item 10, the bot will get confused and may stop the flow.
Besides, if you use the “Date and Time” feature but you forget to fill in the whitelisted domain webview http://webview.botstar.com, the flow may stop (for further details please review question number 2 again).
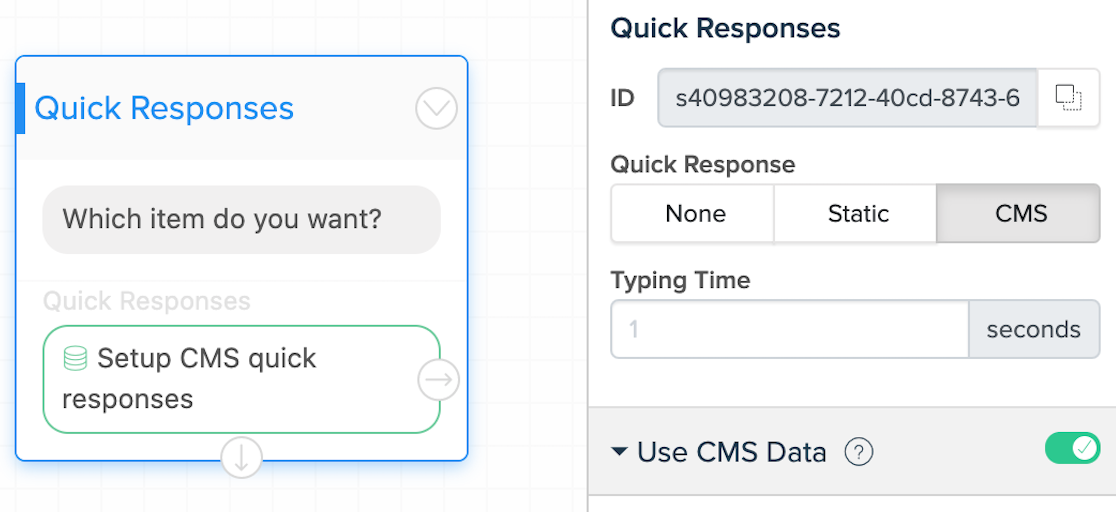
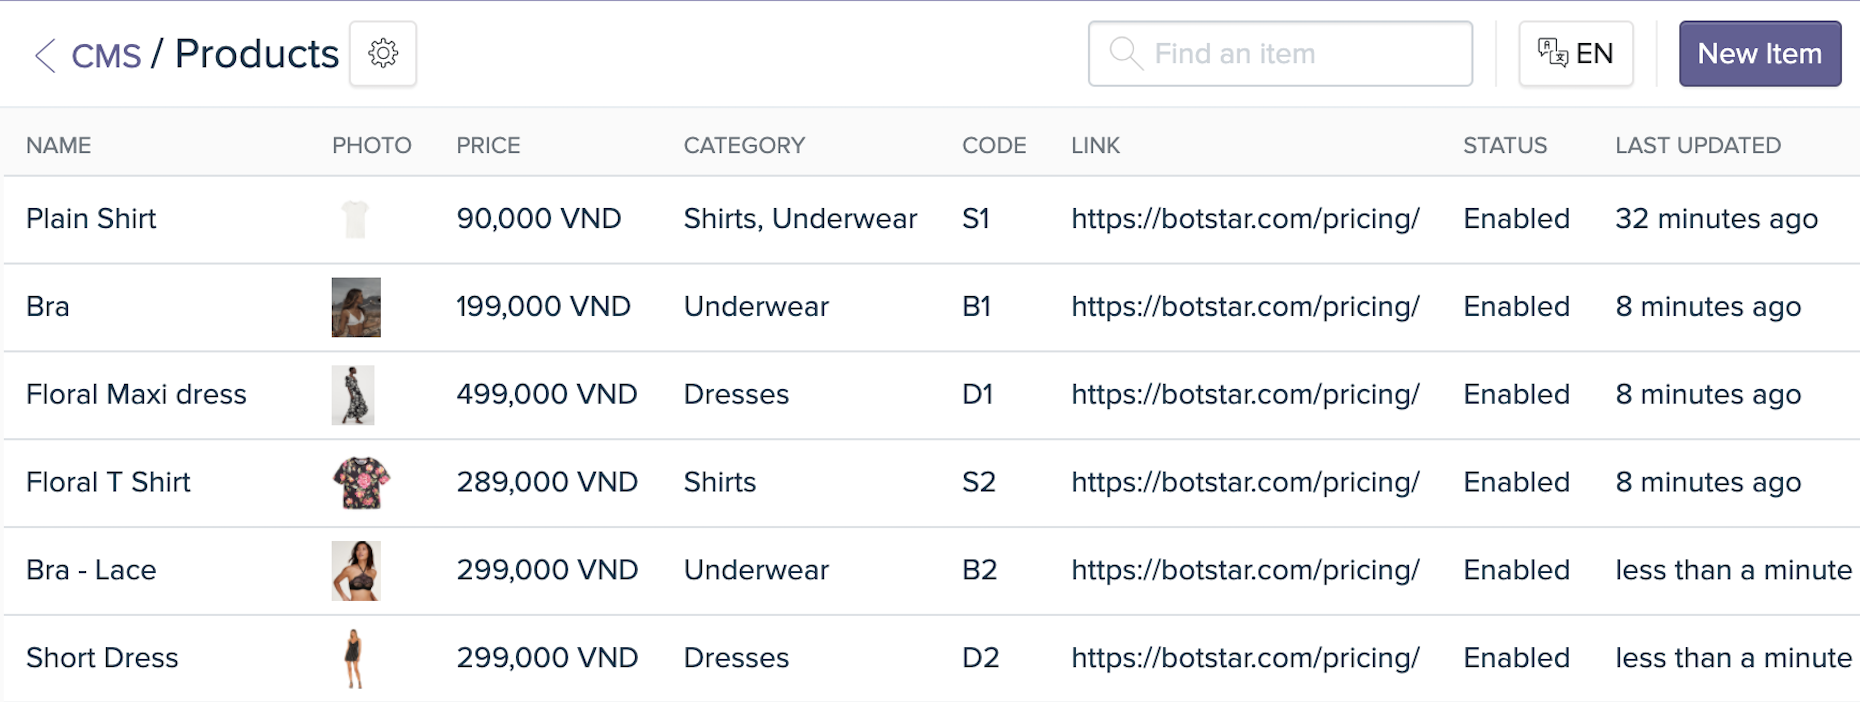
4. How could I show data from CMS to chat users?
Take a look at the Properties bar on your right hand, you’ll see the Quick Response session with 03 options: None, Static and CMS. So, if you don’t want to use the Quick Response, click on the None.
If you would like to use some buttons for choices, Static is a good option. In case you like to connect to the CMS data, you may choose CMS > enable Use CMS Data > click on the text areas, type on the information > insert variables, for example,
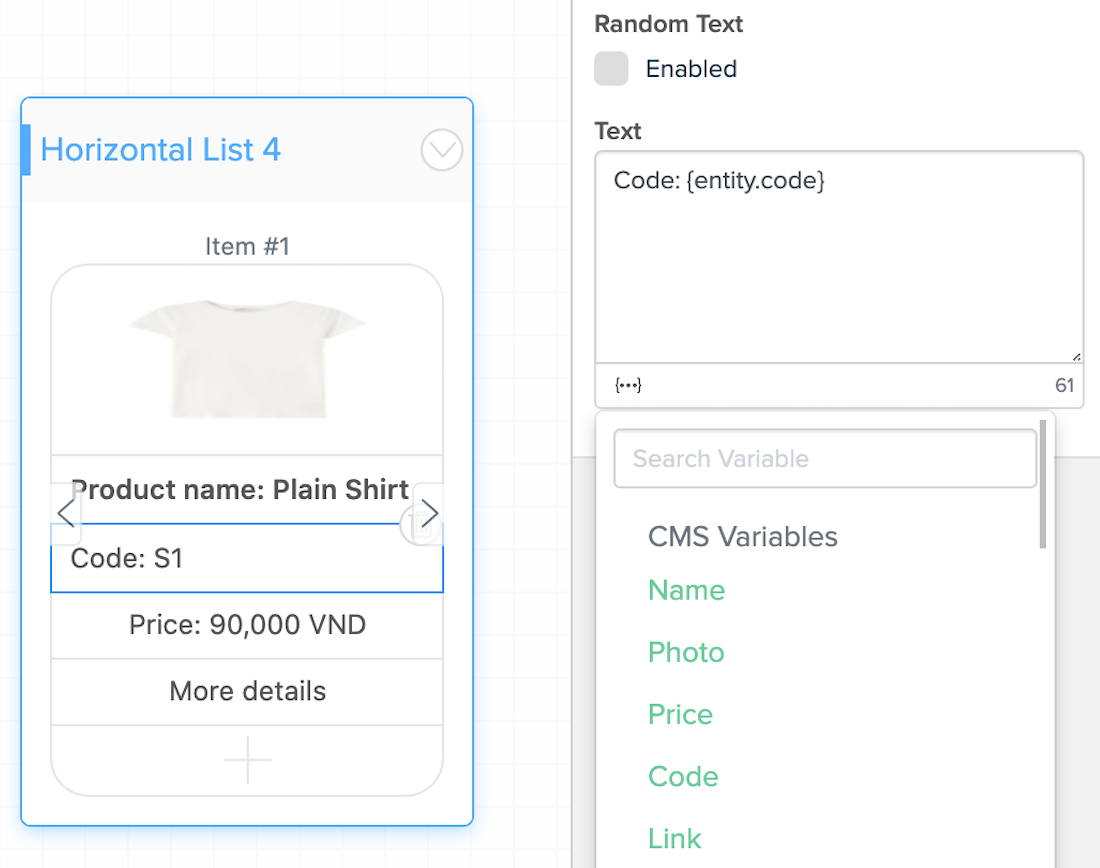
Once you are done with the setup of item #1, you’ll connect all 10 items to CMS data.
Besides, when using Static and CMS you should enable the Expect User Response to save chat users’ react.

5. I’m running a bot on a Facebook page selling 05 products. There is a website for each product. How could I trigger customers to the product site which they are interested in?
You may use the CMS to show customers the products. Then, ask them to click on a button to lead them to the designed website. Here are the steps:
Step 1 Go to CMS > click on the symbol (photo below) > Add New Field: link

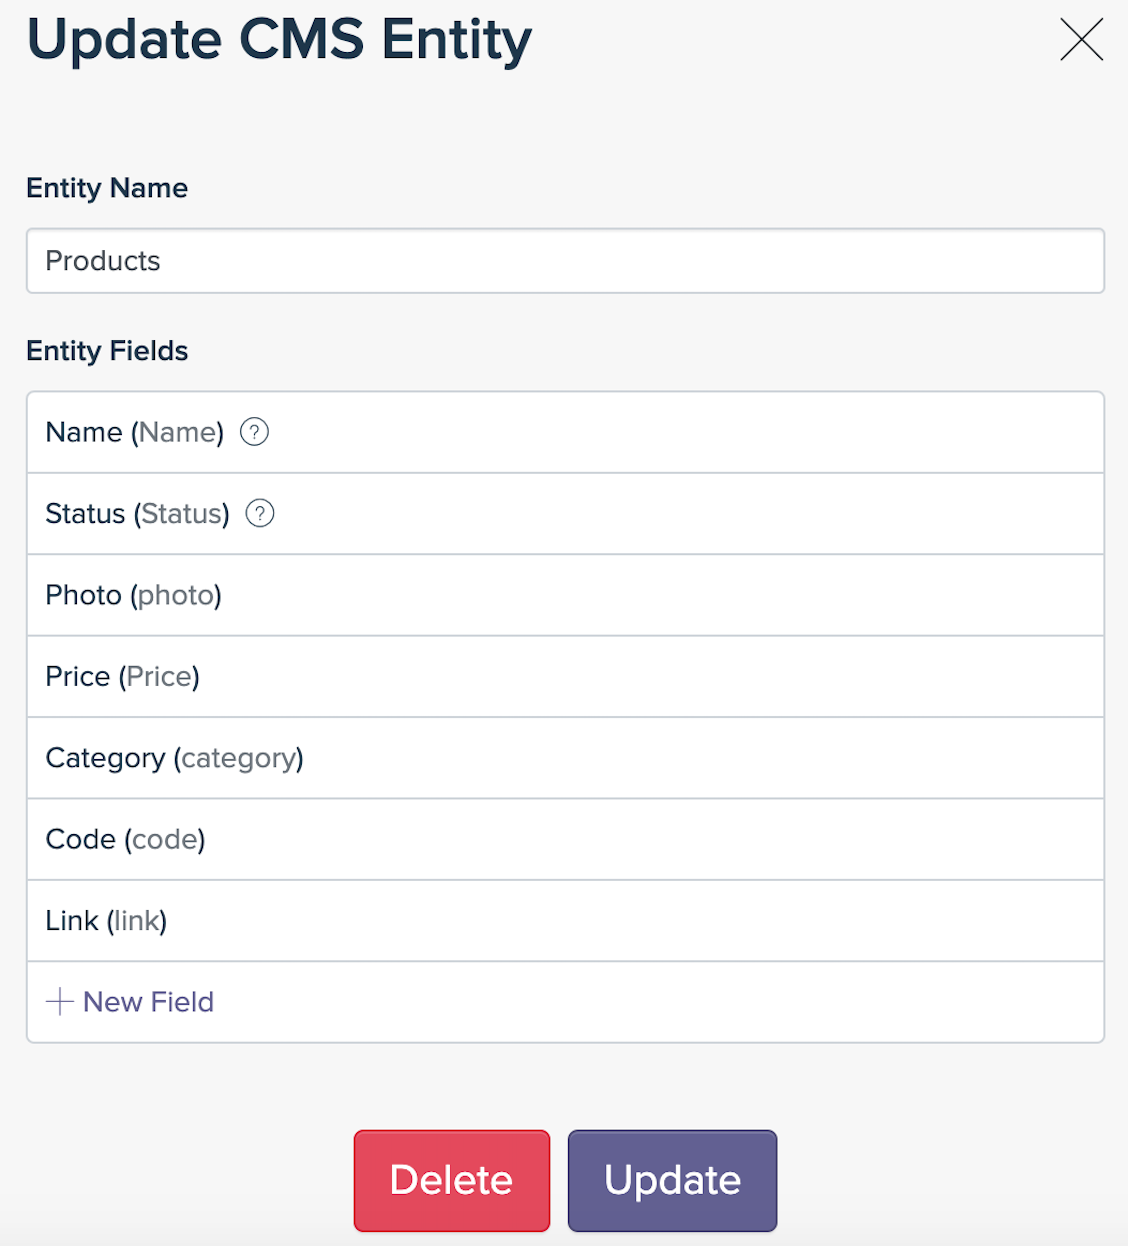
Step 2 Add the links you want in > Publish – Update
Step 3 Go back to the flow > click on the button > in Behaviour, choose Open Webview > in Web URL, choose {entity.link} > Publish – Update.
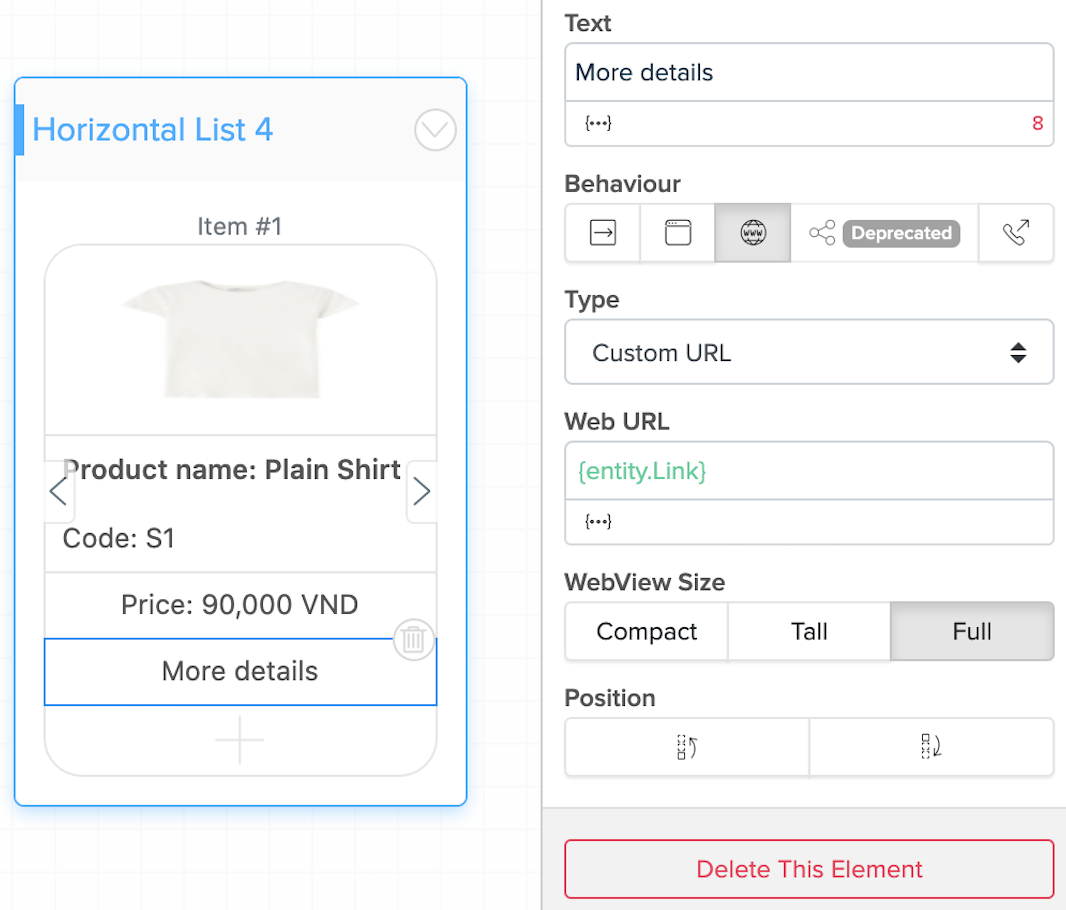
Now, when a customer clicks on the button “More details” he/she will be led to another site.
6. I did create variables in the Data penal and enable the Expect User Response but there is no data in the variables. How could I make it work?
It’s important to add Update Variables blocks after chat users give their answers. You cannot save any data to variables without Update Variables blocks.
For example, you want to capture the name of a chat user: create a variable “Name” > ask chat users “Could I have your name?” at the “Names” block > enable Expect User Response > Update Variables block > set Variable Name to {response.Names} > Publish - Update.
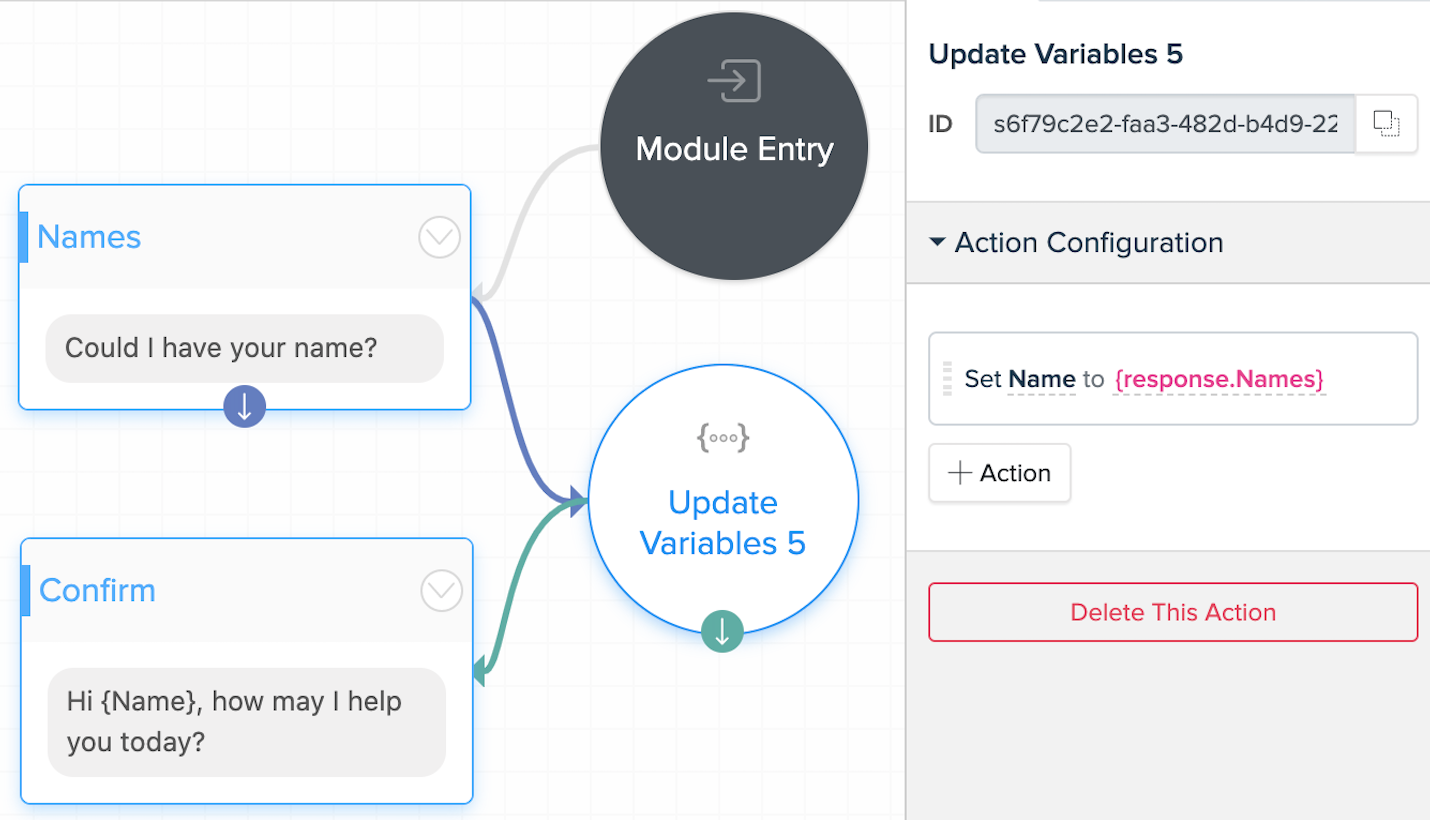
Now, you could test it again to see the result.
7. I would like to show the location of my store address to my customers. How could I do that?
To show the address of your store, you should apply the usage of the button and webview: drag and drop a block with buttons > click on a button > in Behaviour, choose Open Webview > in Web URL, fill in the URL > Publish – Update.
Now, when your customers click on the button, they will be led to the google map site to show the address of your place.

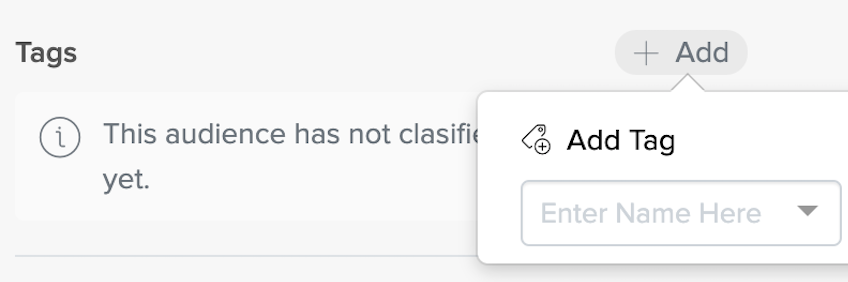
8. I would like to run a promotion program to apply to my VIP customers. How could I set up a flow like that?
You may use Tag to mark some of your customers as VIP. Go to Reports & Insights > Audience and open the chat user's detailed information. Click Add Tag and enter a new tag name or choose a tag in the dropdown list.
After that, you may add conditions for the Tag, once the chat users with the tag go to the design flow, the condition will lead them to the right connector, they may enter the Promotion Program module: click on the connector > Add Condition > choose user’s tag and set up the next blocks as your wish.

Once the chat users who meet the conditions will go to the designed flow and access to the promotion program.
9. In the same bot, how could I divide chat users from Messenger and Web widget into 02 specific flows?
To get this done, you may click on the connector > Add Condition > choose Channel > is (=) > Website/ Messenger. So, once customers are from the Messenger, they will follow the specific flow, and so do people who are from the Website.

If you have any concerns, please feel free to leave a comment below or contact us through support@botstar.com. For more details on how we have helped our customers grow their business, you can view our use cases, blogs or join our BotStar community to learn and share new things 😊