Lesson 3: Use CMS to optimize your bot flow
Estimated reading time: 10 minutes
After building a simple chatbot for "Monoco Shop", in this lesson, you will learn how to optimize your chatbot flow.
Back in the previous lesson, you have already learned to add fashion items manually to showcase your fashion products for Monoco Shop. In case you have a lot of products, how can you manage and update all of these clothing items?
Don’t worry! Our CMS feature (Content Management System) enables you to manage content and update a list of clothing items for Monoco Shop easily and effectively.
In this lesson, you will learn how to:
Plan for CMS
Before creating and updating a list of clothing items, you need to define and prepare the data types you want for the “Monoco Fashion Shop" chatbot to showcase your clothing products.
You may ask yourself some questions to prepare for CMS:
- Does the
CMScreate a positive user experience? - What's the goal of the
CMSfor Monoco Shop? - Which content do I want to showcase? - A lot of things, from texts to images, video, documents
- How many clothing products can I display?
- How can I create and update the list of fashion items?
After answering these questions above, you should prepare the list of clothing items for Monoco Shop, such as photos of fashion items, price tag, description, etc.
Please download a file about CMS items in this lesson: CMS Items.zip
Use CMS to manage data
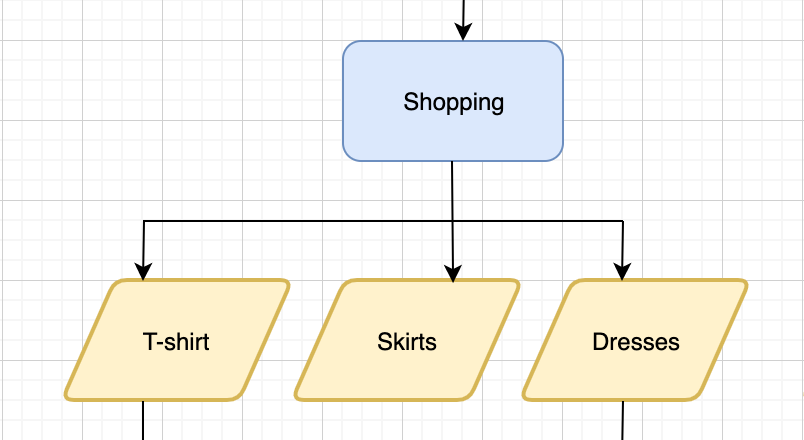
In lesson 2, you've learned how to showcase fashion products for "Monoco Shop" manually as flowchart below using "Horizontal List":
In this article, you will learn how to showcase the list of clothing items and manage them easily and effectively using the CMS feature as shown below:

Set up CMS
To start using CMS to showcase the list of fashion products for "Monoco Shop", follow step-by-step instructions:
1. Go to Bot Builder > CMS, click on "New CMS Entity"
Enter the "Entity Name" and click on the "Create" button

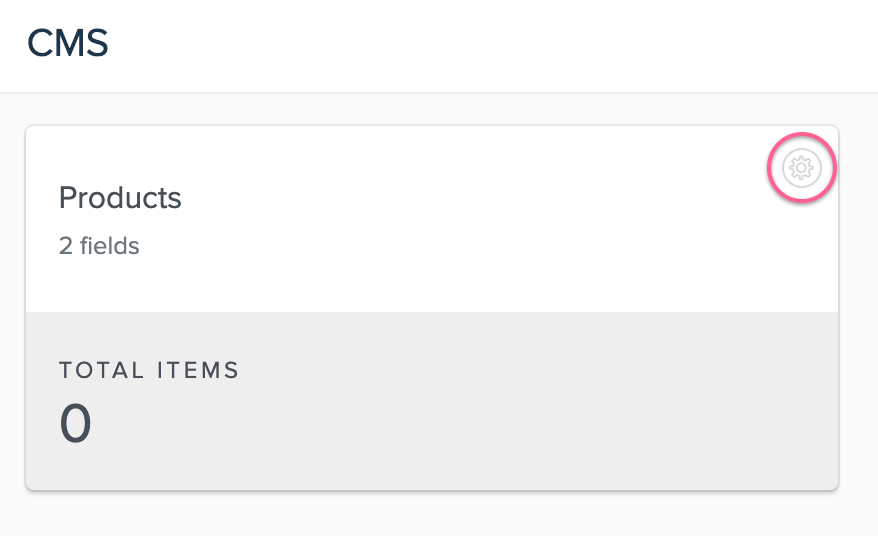
Click on the configuration symbol to start editing an entity
2. Update an Entity
Select tab Form Fields to update and add many Fields for each Entity as you want.
To add a new field, click on the + button, enter the field name for a clothing item (price, photo, description, etc.) and choose the data type as shown below:

You can use data type as Entities Reference to link to another Entity by creating two entities. The first entity is "Category" (illustrating the types of clothing: T-Shirts, Skirts and Dresses)
Another entity is "Products" (including many items of clothing), so you can link "Products" entity to "Category" entity to categorize clothing items

Delete any field by selecting the button-shaped the Trash
3. Create CMS Items
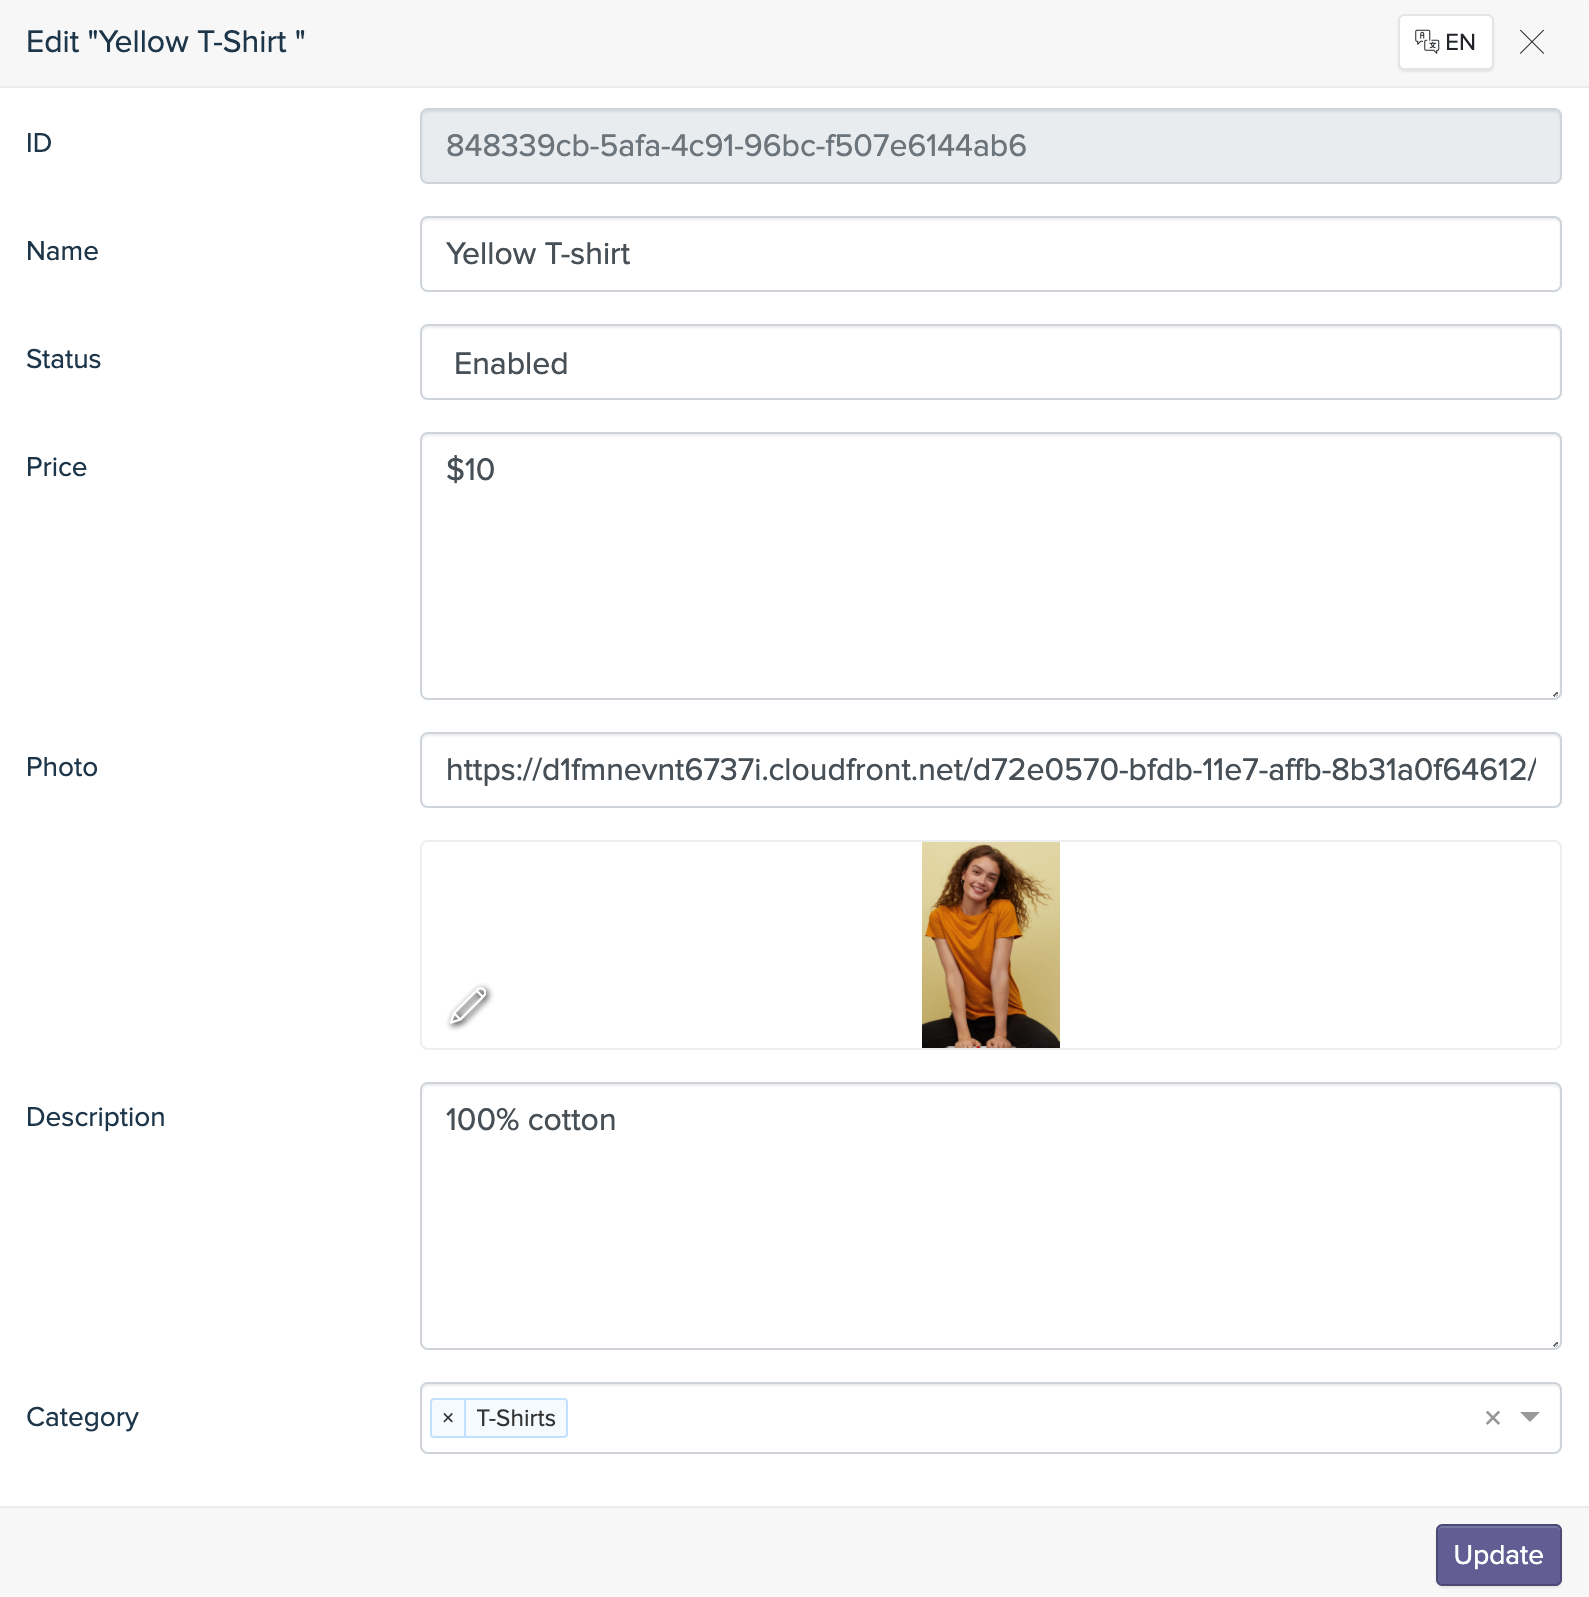
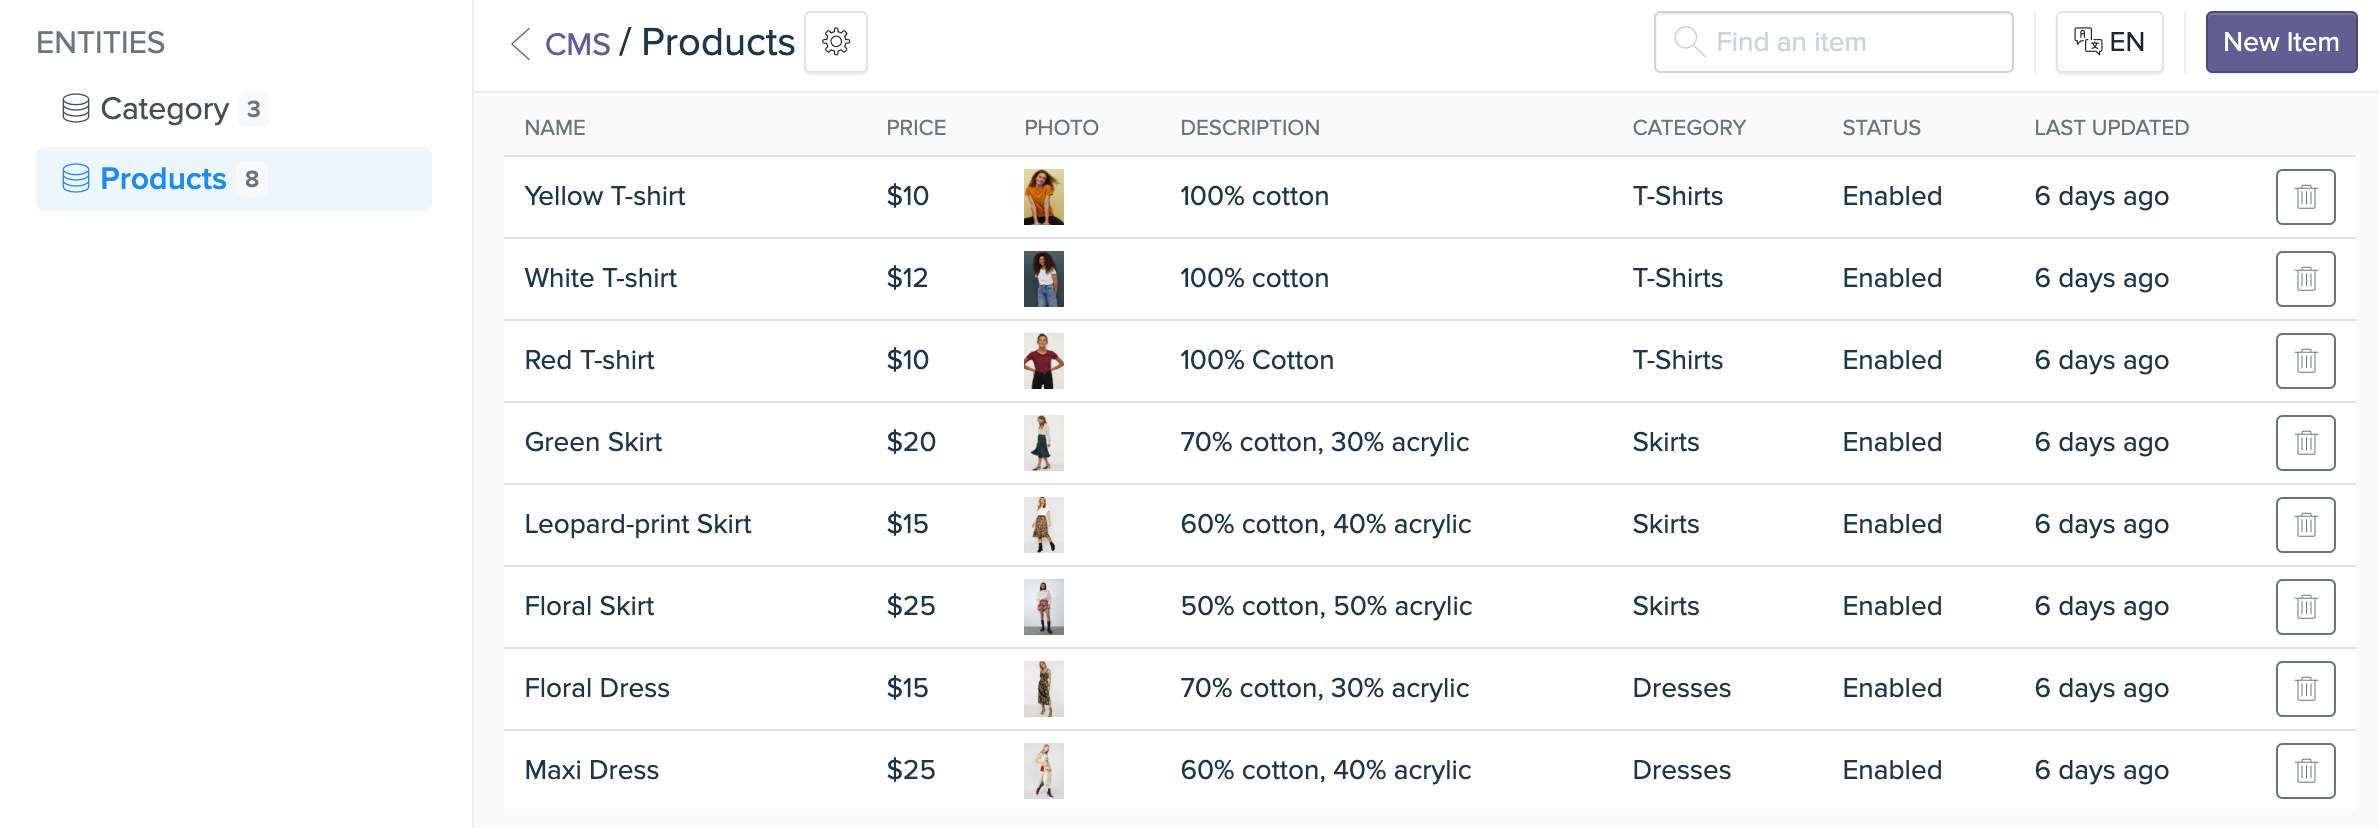
After creating two entities, click on each entity and press the New Item button on the upper right corner of the screen to add a new clothing item.
Fill in all the needed information about clothing items (name, price, photo, description and category) and click on Create button to create a clothing item or Update if you want to update a clothing item for "Monoco Shop"
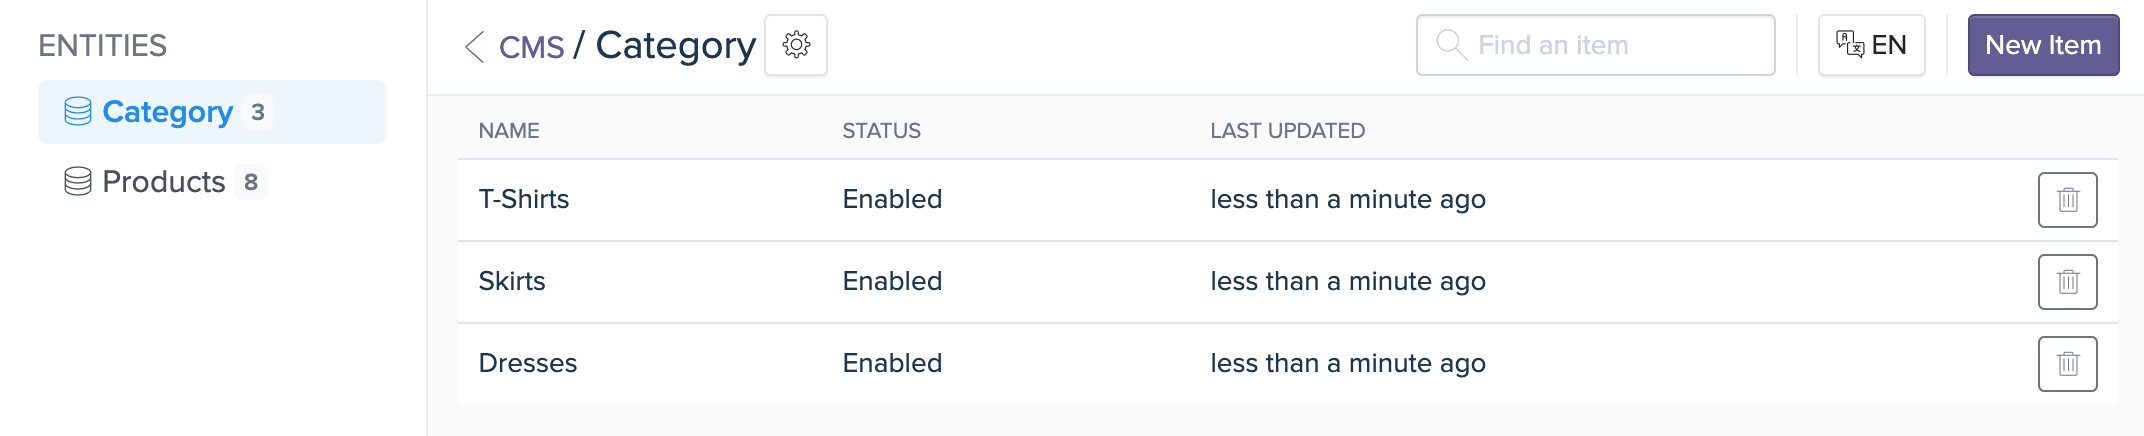
Good job! See the list of clothing items for "Monoco Shop" as shown below:
List CMS items in a quick response
After creating Entities and add fashion items, now you can insert CMS data into most of all blocks that BotStar supports to showcase a list of clothing items:

Follow these steps to insert CMS data into a quick response to showcase the category of clothing items:
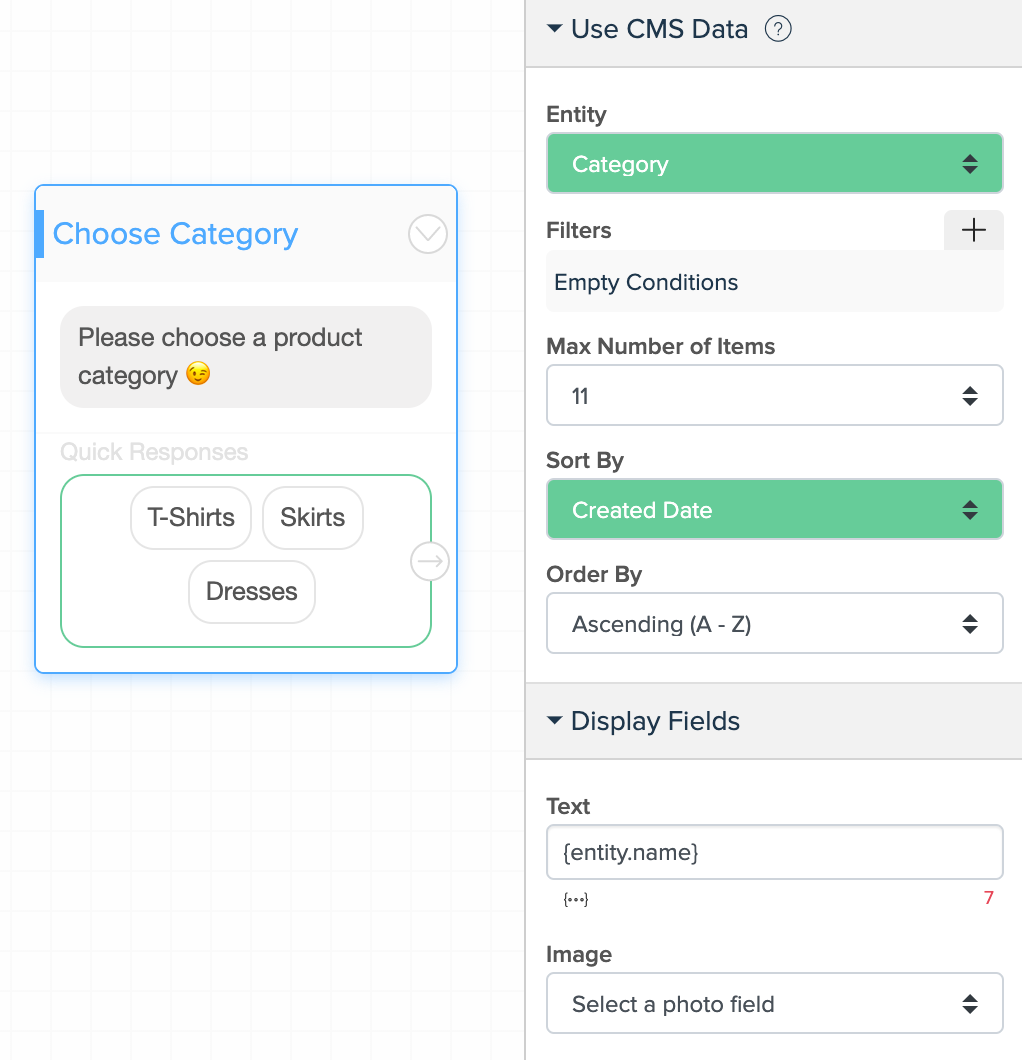
1. Choose "CMS" in "Quick Response" to use CMS data

2. Click on Setup CMS quick responses and choose Entity "Category" to show Menu (including three options: T-Shirts, Skirts and Dresses)
List CMS items in a block
Follow these steps to list CMS items in a block to showcase the clothing items for each clothing category:
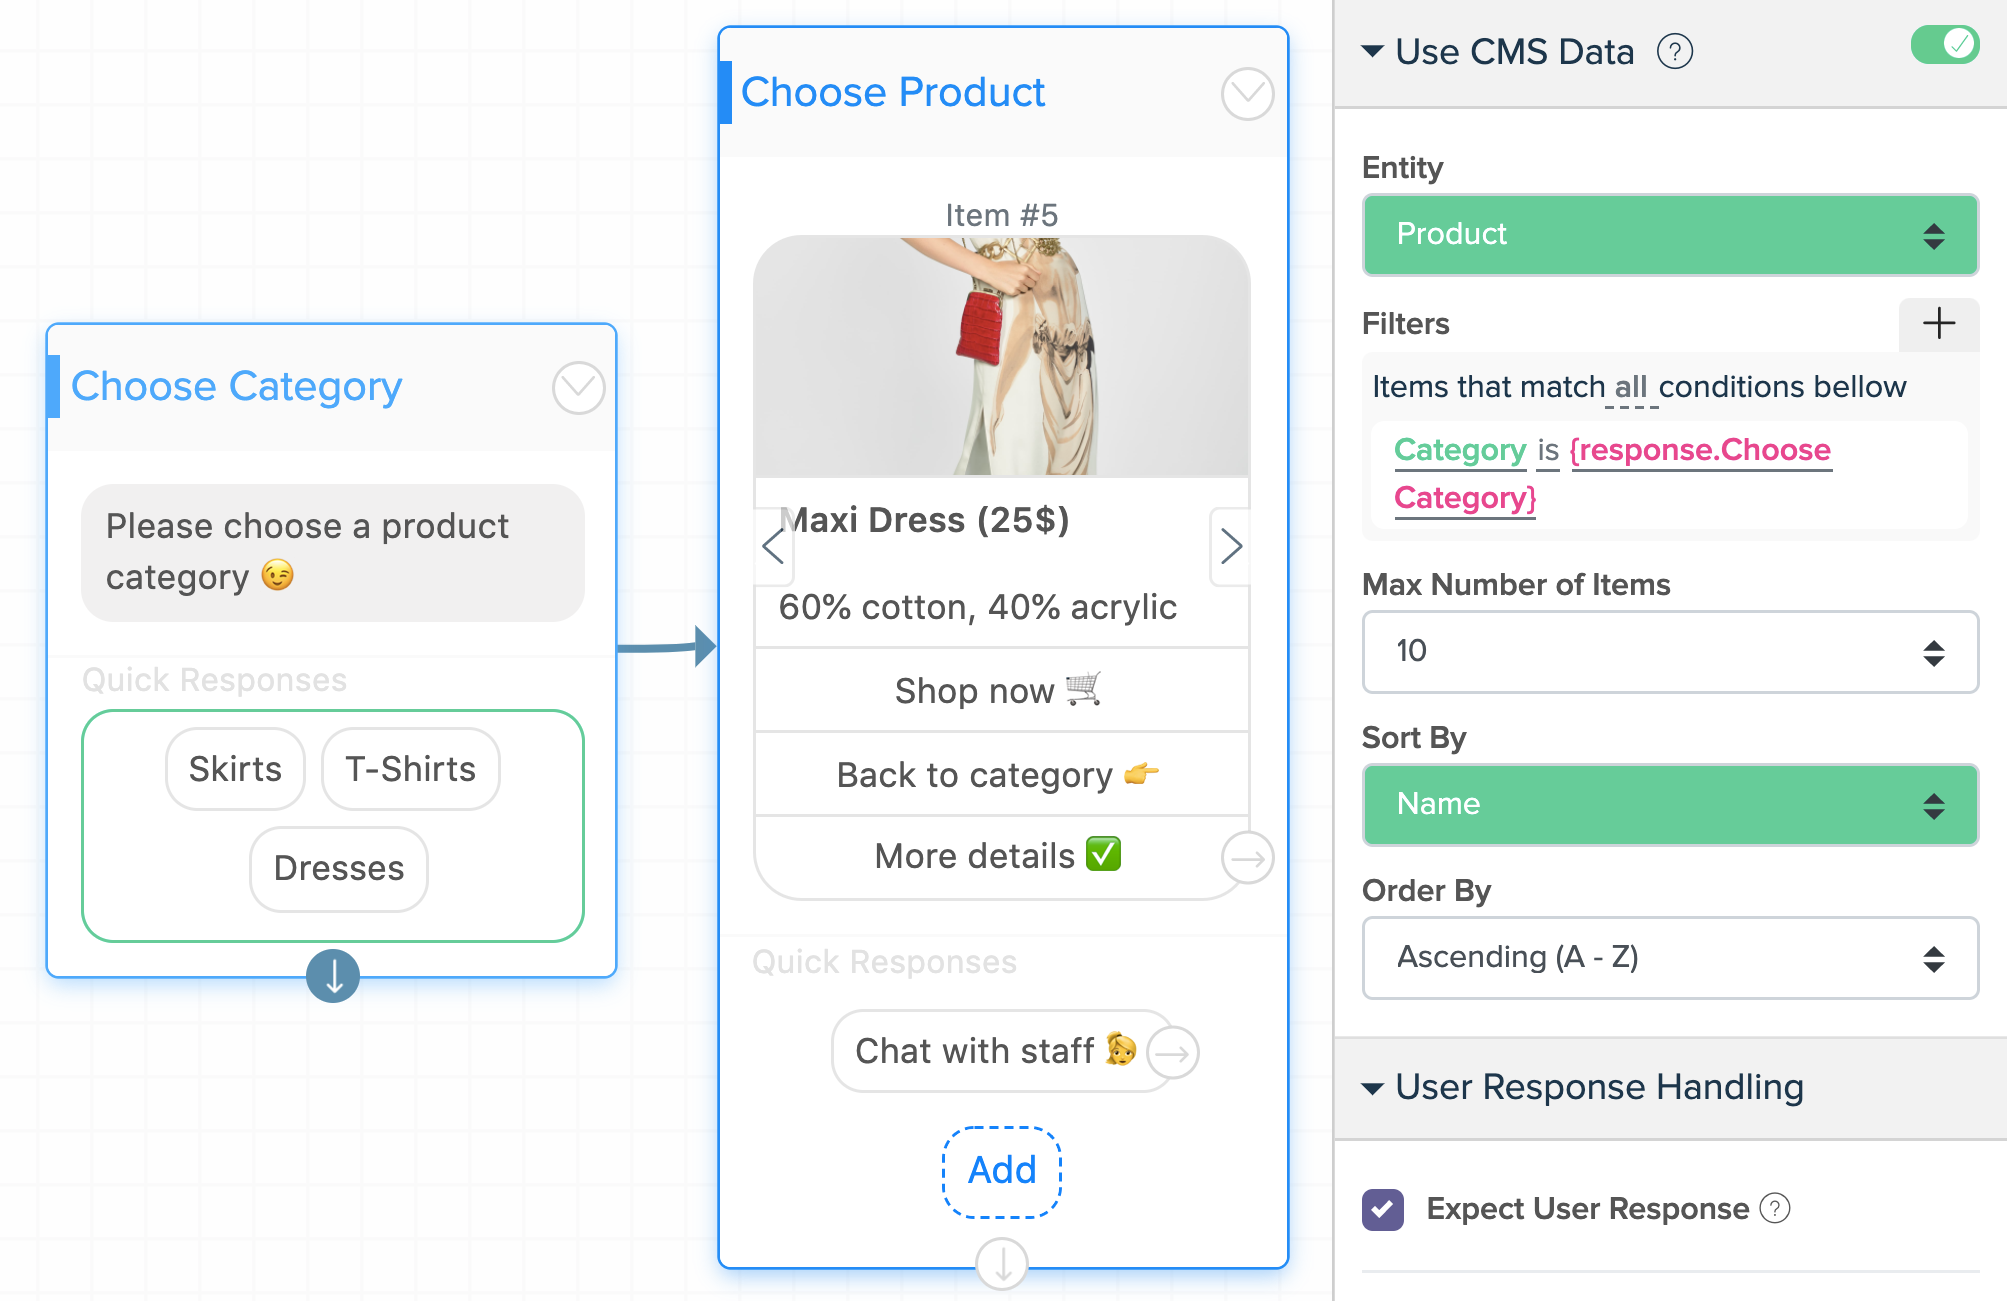
1. Drag and drop a Horizontal List Block into Flow Editor to display a list of fashion items, enable Use CMS Data, choose "Entity" as "Product"

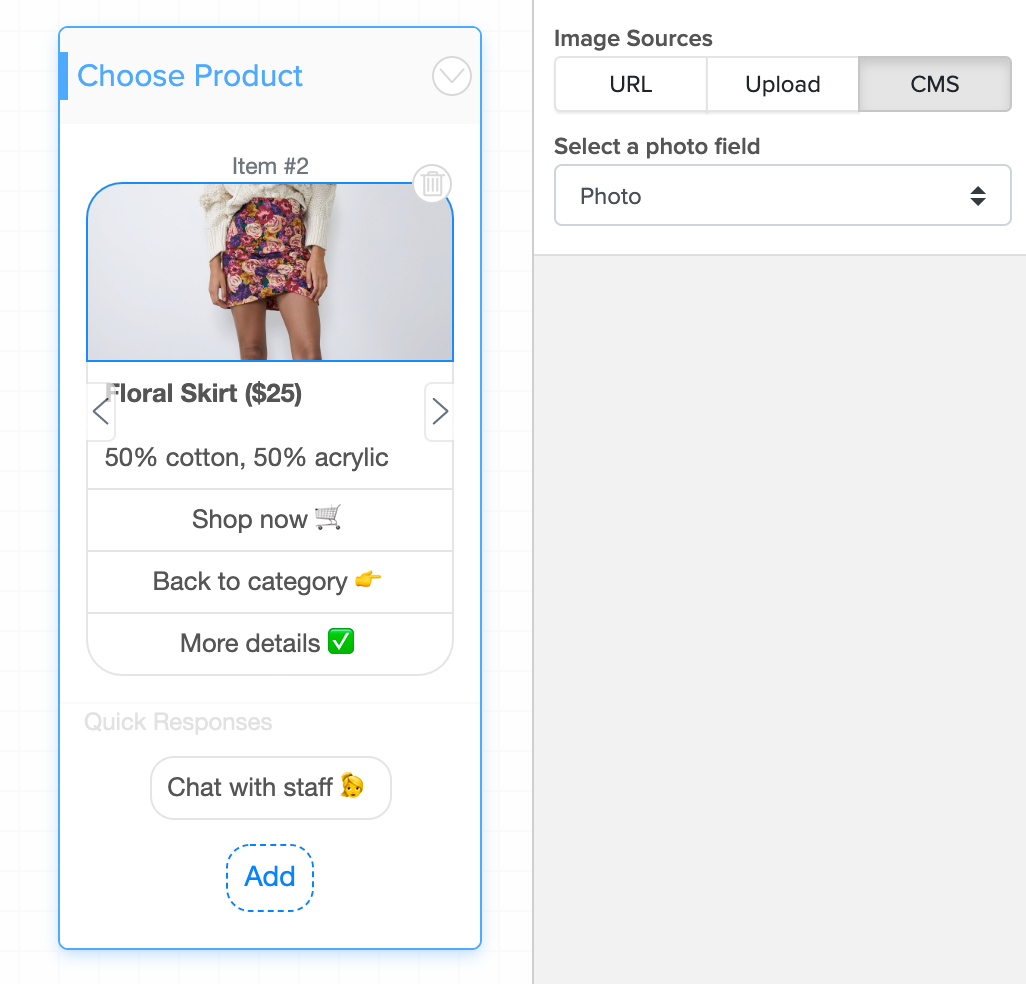
2. Map elements of a block with fields of CMS entity to showcase fashion products
Click on "Text element", use "Insert Variables" symbol to insert the title and description of clothing items

Click on "Image element", select CMS in Image Sources, select the field "Photo" to showcase the clothing images
Enable "Expect User Response" to save user response for "Choose Category" block
Connect between two blocks using a connector, then filter conditions based on user response of "Choose Category" to display the right clothing items as you expect
Drill down CMS data
Well done! Now you can drill down CMS data to describe more clothing items for "Monoco Shop". It provides your customers with more information about fashion items.
Create a block to show more details of a clothing item. Use a connector to connect between blocks. Enable "Use CMS Data", choose "Entity" and filter condition

Insert the details of clothing items by drill down CMS data into text element using "Insert Variables"

Test on Preview
After using CMS to showcase clothing items like the steps above, the bot flow might look like this:
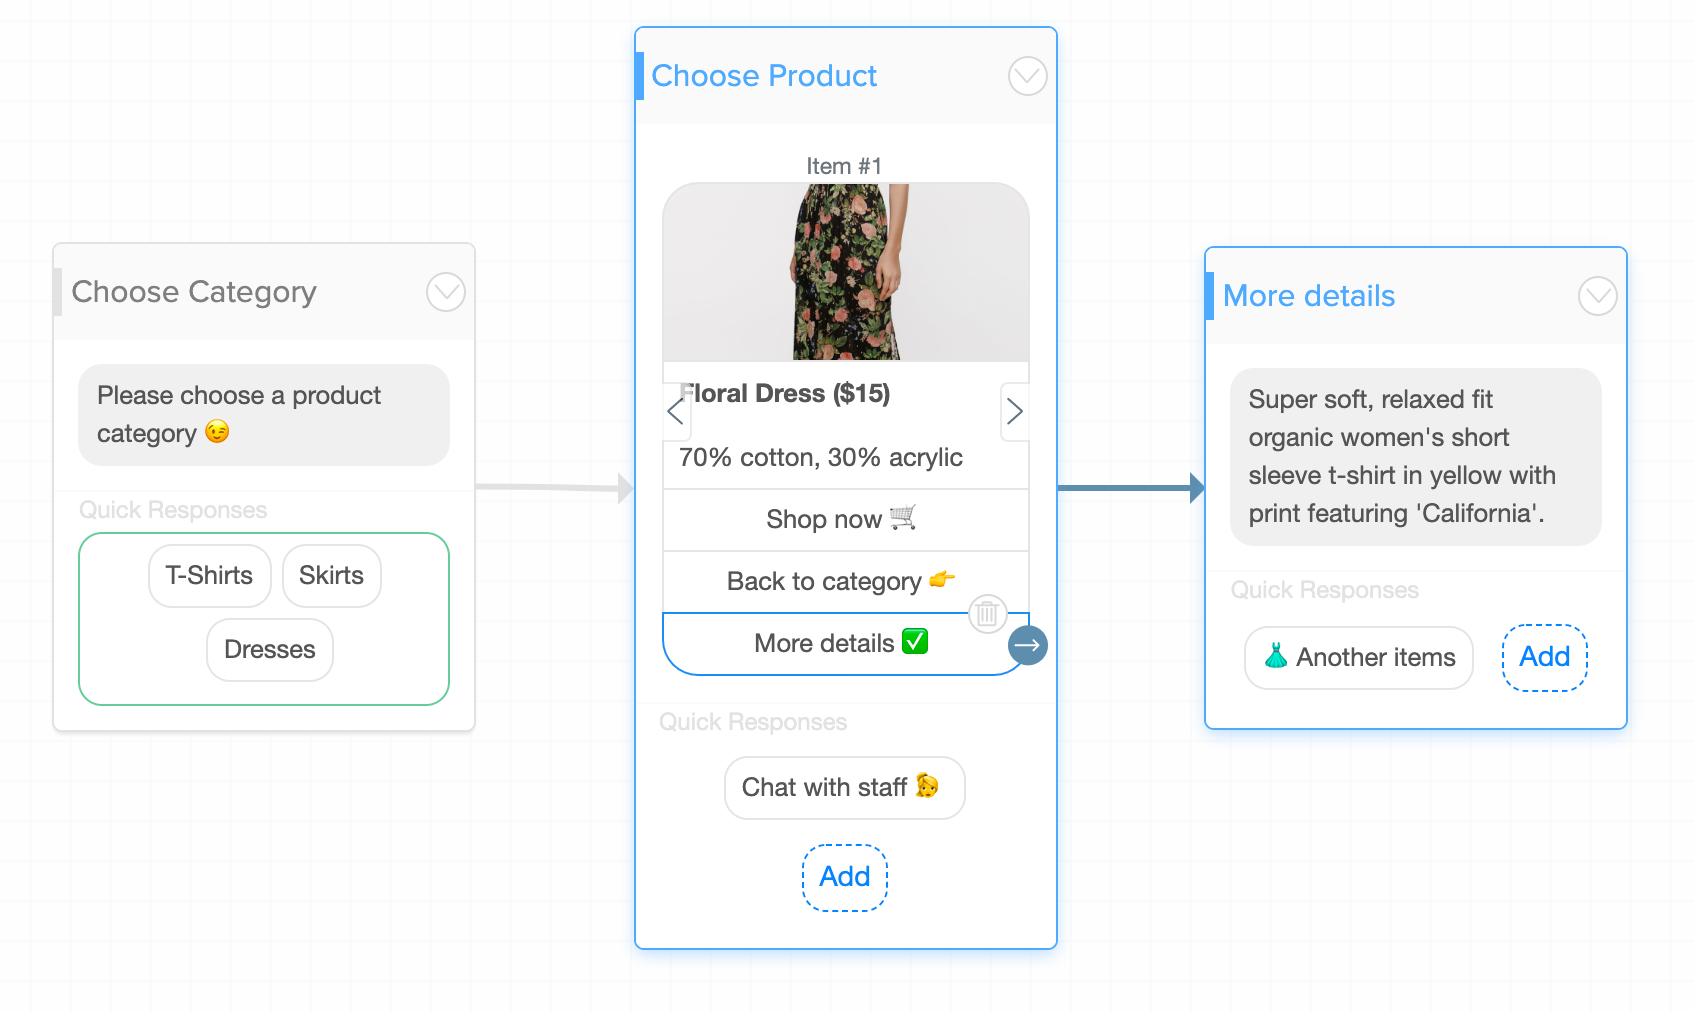
OK! Now you can test on Preview to see the result
For more details, please visit our CMS
Congratulations! After finishing lesson 3 of the Mini-Course, you have already created a simple chatbot for Monoco Fashion Shop. Now take a pause and let's review what you have done so far:

In the next lessons, you will learn how to add more interesting features to extend the functionality of your bot for Monoco Fashion Shop. In lesson 4, you will learn to collect and manage your clothing orders better 😊
If you have any concerns, please feel free to leave a comment below or contact us through support@botstar.com. For more details on how we have helped our customers grow their business, you can view our use cases, blogs or join our BotStar community to learn and share new things 😊